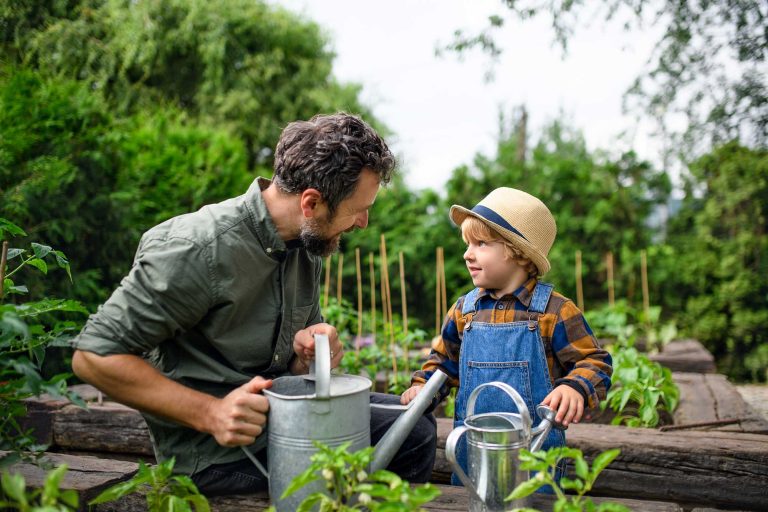
Imagine stepping into your garden and feeling the timeless charm of tools that have stories etched into their handles and blades. These antique garden tools are not just instruments of work; they are heirlooms that connect you to the past.
Perhaps you’ve inherited them from a loved one or stumbled upon them at a quaint flea market. Whatever their origin, they hold a special place in your heart and deserve to be revived to their former glory. Restoring antique garden tools isn’t just about preservation; it’s about breathing new life into pieces of history and enhancing your gardening experience.
You might be wondering how you can transform those rusted, worn-out relics into functional, beautiful tools once again. This article is here to guide you through the restoration process, ensuring you can not only admire but also use your antique garden tools with pride. From understanding the materials to learning the right techniques, you’ll discover how to make these tools shine like new. Plus, there’s a secret satisfaction in knowing you’ve saved a part of history. So, are you ready to roll up your sleeves and get started? Let’s dive into the art of restoration together.
Identifying Antique Garden Tools
Restoring antique garden tools begins with identifying their age and materials. Look for unique features like wooden handles and metal types. Clean gently to reveal original details, ensuring preservation while maintaining functionality.
Identifying antique garden tools can be a rewarding journey for any gardening enthusiast or collector. These tools carry the charm and craftsmanship of past eras, often telling stories of their own. But how do you distinguish an antique tool from a mere old one? Knowing what to look for can make all the difference in preserving a piece of history.Recognizing Material And Craftsmanship
Antique garden tools were often crafted from high-quality materials like wrought iron and hardwood. You might notice the weight and feel different from modern tools. Look for signs of hand-forging, such as irregularities in the metalwork, which can indicate an older tool.Examining Tool Design And Features
The design of antique tools can be quite different from today’s ergonomic styles. Handles were often longer, and blades had unique shapes. Compare your tool with historical references or catalogs to spot distinctive design features.Looking For Maker’s Marks And Stamps
Many antique tools have maker’s marks or stamps, often found on the metal parts. These marks can identify the manufacturer and sometimes even the year of production. Researching these marks can provide valuable insights into the tool’s origin.Assessing Wear And Patina
The wear and patina on a tool can speak volumes about its age. Look for natural aging signs like rust, wood grain wear, and handle smoothness. These features can add to the tool’s authenticity and charm.Consulting Expert Opinions
When in doubt, consulting with antique experts or joining collector groups can be beneficial. They can offer insights and help validate your findings. Sharing experiences with fellow enthusiasts can also enhance your knowledge and appreciation. By honing your skills in identifying antique garden tools, you not only enrich your collection but also preserve a piece of gardening history. Can you imagine the stories these tools could tell if they could speak?
Credit: www.crcindustries.com
Assessing The Condition
Evaluating antique garden tools is vital before restoration. Check for rust, cracks, and missing parts to assess their condition. This step ensures a successful restoration process, preserving the tool’s integrity and functionality.
Assessing the condition of antique garden tools is a crucial step in restoration. Understanding the state of your tools helps in deciding the best restoration approach. It involves a careful examination to identify signs of wear and damage. This assessment allows you to determine if restoration is feasible.Signs Of Wear And Damage
Look for rust on metal parts. Rust can weaken metal and make tools unsafe. Check wooden handles for cracks or splits. These can affect grip and usability. Inspect joints and moving parts. Look for stiffness or difficulty in movement. Examine tools for dents or bends. These can impact the tool’s effectiveness.Determining Restoration Feasibility
Consider the extent of rust. Minor rust can be cleaned. Severe rust may require replacement. Evaluate handle damage. Small cracks are fixable. Splits might need replacement. Assess the cost of restoration. Compare with buying new tools. Determine sentimental value. Some tools are worth restoring for personal reasons.Gathering Restoration Materials
Sourcing the right materials is vital for restoring antique garden tools. Seek out quality wood and sturdy metal parts. Visit local flea markets or antique shops for authentic pieces.
Restoring antique garden tools is a rewarding process that brings history back to life. Before diving into the restoration, gathering the right materials is crucial to ensure a successful transformation. This preparation phase sets the foundation for a smooth restoration journey.Essential Tools For Restoration
To begin, you’ll need a set of basic tools that can handle the demands of restoration. A wire brush and sandpaper are indispensable for removing rust and dirt. My grandfather’s old garden trowel came back to life with just a wire brush and some elbow grease. A sturdy pair of pliers will help in disassembling parts that are stuck or need tightening. Don’t forget a small hammer or mallet, useful for straightening bent metal without causing damage. A good-quality file helps in sharpening blades, ensuring your tools are not just beautiful but functional too.Choosing The Right Cleaning Agents
Selecting the appropriate cleaning agents is vital for preserving the integrity of antique tools. White vinegar is a fantastic rust remover; just soak your tools overnight for effective results. Baking soda mixed with water forms a paste that works well for scrubbing away stubborn grime. This simple mixture revived my rusty pruners to a shiny finish. For tougher stains, consider using a mild detergent or specialized metal cleaner. Be sure to test any cleaner on a small area first to avoid damage. What cleaning agents have you found most effective in your restoration projects?
Credit: www.crcindustries.com
Cleaning Techniques
Restoring antique garden tools requires gentle cleaning techniques to preserve their history. Use mild soap and water to remove dirt. Carefully scrub with a soft brush to prevent scratches.
Cleaning Techniques Restoring antique garden tools can be a rewarding endeavor, breathing life back into items that have weathered many seasons. But before you can show them off in your garden, they need a thorough cleaning. This stage is crucial in preserving their historical charm and ensuring they work like a charm. Whether you’re dealing with rusty blades or worn wooden handles, effective cleaning techniques can make all the difference.Removing Rust And Corrosion
Rust is the arch-enemy of metal garden tools, silently eating away their integrity. To combat this, start by soaking the metal parts in white vinegar overnight. This simple household item softens rust, making it easier to scrub off. Use a wire brush or steel wool to gently remove the loosened rust. Consider wearing gloves to protect your hands during this process. After scrubbing, rinse the metal thoroughly with water and dry it immediately to prevent new rust from forming. For stubborn corrosion, a paste made from baking soda and water can be more effective. Apply the paste on the affected areas, let it sit for a while, then scrub it off. These techniques are not only practical but also allow you to save money on commercial rust removers.Handling Wooden Handles
Wooden handles bring a rustic charm to garden tools but can suffer from neglect over time. Begin by wiping down the handle with a damp cloth to remove dirt and grime. If you notice splinters or rough patches, gently sand them down using fine-grit sandpaper. This step ensures a smooth finish and prevents future splinters. Once smooth, apply linseed oil to nourish and protect the wood. Linseed oil penetrates deep into the wood, restoring its natural color and enhancing its durability. You might wonder, is it worth the effort? Absolutely! Proper care can extend the life of your wooden handles, keeping them sturdy and comfortable to use. Remember, these tools have stories to tell—preserving their wooden handles ensures those stories continue for years to come.Repairing And Replacing Parts
Restoring antique garden tools involves careful inspection and repair. Identify damaged parts and replace them with period-appropriate pieces. Ensure tools retain their original charm while enhancing functionality.
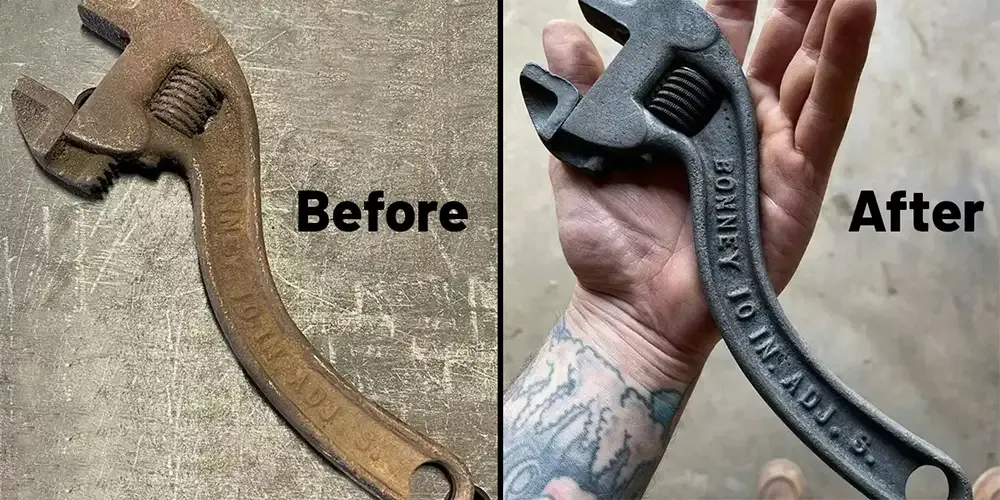
Restoring antique garden tools is not just about preserving history; it’s about reviving functionality and charm. When you embark on this restoration journey, you’ll often find that some parts need repair or replacement. This process is crucial to ensure that your tools not only look good but are also ready for use in your garden. Let’s explore how you can mend metal components and replace handles and grips effectively.Mending Metal Components
Metal components of antique tools often bear the brunt of time, showing signs of rust, dents, or even missing pieces. To bring them back to life, start by thoroughly cleaning the metal with a wire brush or sandpaper. This will help you assess any damage and prepare the surface for repair. For minor rust, a vinegar soak can work wonders, dissolving rust without harming the metal. If you’re dealing with larger dents, a ball-peen hammer and anvil can help reshape the metal. For more severe cases, consider welding or soldering, but ensure you have the right skills or consult a professional to avoid further damage.Replacing Handles And Grips
Handles and grips are often the first to deteriorate, as they endure constant stress and exposure to the elements. Replacing them is a straightforward process that can significantly improve both the look and usability of your tools. First, remove the old handle carefully, ensuring you don’t damage the tool’s metal parts. Choose a replacement handle made from durable wood like ash or hickory, which offers strength and flexibility. Cut and shape it to fit your tool, then secure it with screws or rivets. For grips, consider using leather or rubber materials for comfort and durability. If you prefer a more vintage feel, wrap the handle with jute twine, securing it with a knot or adhesive. This not only provides a sturdy grip but also adds a rustic touch to your restored tool. Are you ready to transform your antique garden tools into functional art pieces? With a little effort, you can enjoy the satisfaction of using a tool that’s both historic and practical.Preserving And Protecting
Restoring antique garden tools involves cleaning rust and dirt from metal surfaces. Apply a rust remover and scrub gently. For wooden handles, sand them lightly and apply a coat of linseed oil. This process not only preserves the tools but also enhances their functionality and charm.
Preserving and protecting your antique garden tools is essential to ensure they remain functional and beautiful for years to come. It’s not just about keeping them looking good; it’s about maintaining their historical value and usability. With the right care, your cherished pieces can become heirlooms that tell stories of the past while still serving you in the present.Applying Protective Coatings
Applying a protective coating is a crucial step in preserving your antique garden tools. A simple mixture of linseed oil and beeswax can work wonders. This combination not only adds a layer of protection but also enhances the natural patina of the metal and wood. Start by cleaning the tools thoroughly to remove any dirt or rust. Use a soft cloth to apply a thin coat of the mixture, ensuring you cover all surfaces, especially joints and handles. Allow it to dry completely before storing the tools. Consider using a rust inhibitor spray for metal parts. These sprays create a barrier against moisture, preventing future rusting. Remember to reapply these coatings periodically to maintain optimal protection.Storing Restored Tools
Proper storage plays a significant role in protecting your restored tools. A dry, cool place is ideal to prevent moisture buildup, which can lead to rust. Hang tools on a pegboard in your garage or shed to keep them off the ground and away from damp surfaces. Wrap the metal parts with a cloth infused with a bit of oil to add an extra layer of protection. You could also use silica gel packets in your storage area to absorb excess moisture. Consider the stories these tools could tell if they could speak. By caring for them properly, you’re preserving not just their functionality but their legacy. How will you ensure these treasures remain a part of your gardening journey?Restoration Tips From Experts
Reviving antique garden tools begins with gentle cleaning using soapy water. Ensure thorough drying to prevent rust. Apply light oil to moving parts for smooth operation. Regular maintenance preserves the charm and functionality of these vintage treasures.
Restoring antique garden tools can be a rewarding and enjoyable endeavor. Whether these tools are cherished heirlooms or exciting flea market finds, breathing new life into them can bring a unique charm to your garden. Expert restoration tips can guide you through this process, ensuring you avoid common pitfalls and enhance the longevity of your tools.Common Mistakes To Avoid
Neglecting to clean tools thoroughly before restoration is a frequent oversight. Dirt and rust can hide damage that needs attention. Always start by scrubbing away grime with a wire brush and soapy water. Using the wrong products can also be detrimental. Avoid harsh chemicals that can damage the metal or wood. Opt for natural solutions like vinegar for rust removal, which is both effective and gentle. Rushing the process is another mistake. Restoration requires patience. Allow time for each stage, whether it’s soaking metal parts or letting oil penetrate the wood handles.Enhancing Tool Longevity
Regular maintenance is key to extending the life of your restored tools. After each use, clean and dry your tools to prevent rust and decay. A simple wipe down can make a significant difference. Consider applying a protective coat to the metal parts. A thin layer of machine oil can prevent moisture from causing rust. For wooden handles, linseed oil works wonders in keeping the wood nourished and strong. Store your tools properly when not in use. Hanging them in a dry shed or garage prevents unnecessary wear. Avoid leaving them on damp ground, which can lead to corrosion. Restoring antique garden tools not only preserves history but also provides a sense of accomplishment. Have you ever brought an old tool back to life? Share your experience and join the conversation!
Credit: www.youtube.com
Frequently Asked Questions
How Do I Clean Antique Garden Tools?
To clean antique garden tools, use a wire brush to remove rust. Soak tools in a vinegar solution for deeper cleaning. Rinse with water and dry thoroughly. Apply linseed oil to wooden handles for protection. Regular maintenance ensures longevity and optimal functionality of your treasured tools.
What Oils Protect Antique Garden Tools?
Linseed oil and mineral oil are ideal for protecting antique garden tools. They prevent rust and preserve wooden handles. Apply a thin coat after cleaning and drying tools. Regular oiling maintains your tools’ condition and extends their lifespan, ensuring they remain functional and beautiful.
Can Vinegar Remove Rust From Garden Tools?
Yes, vinegar is effective for removing rust from garden tools. Soak the tools in white vinegar overnight. The acidity of vinegar dissolves rust, making it easier to scrub off. Rinse and dry the tools thoroughly after soaking to prevent further rusting and ensure their longevity.
How To Repair Wooden Handles On Tools?
To repair wooden handles, first sand them to remove splinters. Apply wood glue to any cracks or splits. Clamp and let it dry completely. Finish with linseed oil to protect and restore the handle. Regular maintenance prevents damage, ensuring your antique tools remain in excellent condition.
Conclusion
Restoring antique garden tools can be a rewarding hobby. It brings life back to old, forgotten pieces. The process involves cleaning, repairing, and preserving. Each step ensures the tools last longer. You gain skills and appreciation for craftsmanship. Plus, you save money by reusing tools.
It’s a sustainable choice for gardeners. Your restored tools can even become family heirlooms. Remember, patience is key. Take your time with each tool. Enjoy the journey of restoration. With care, these tools can serve you well. A little effort preserves history and function.
Start today and watch your garden thrive.