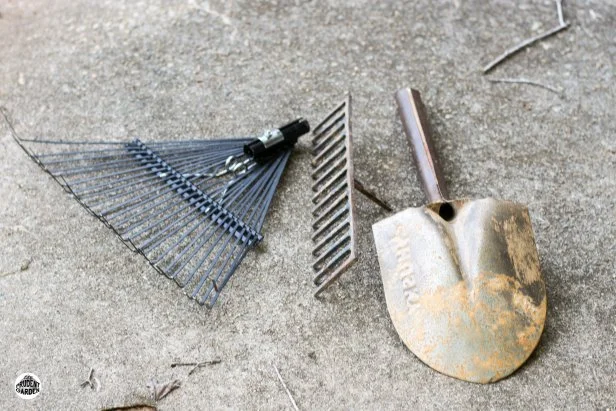
Are your trusty garden tools not performing as they once did? Perhaps your pruners are dull, your shovel is rusted, or your rake is missing a few teeth.
You know that maintaining a healthy garden requires the right tools, but what happens when those tools need a little TLC themselves? Don’t rush out to buy new ones just yet! You have the power to restore them to their former glory with a few simple steps.
Imagine the satisfaction of saving money and breathing new life into your equipment. In this guide, we’ll show you exactly how to repair your garden tools, making them as good as new. Your garden—and your wallet—will thank you. Ready to roll up your sleeves and get started? Let’s dive in!
Credit: www.hgtv.com
Essential Tools For Repairing Garden Equipment
Repairing garden tools requires basic equipment like wrenches, screwdrivers, and sharpening stones. These tools help maintain blades and tighten loose parts. Keeping garden equipment in good shape ensures efficient gardening and extends their lifespan.
When garden tools lose their edge or break, fixing them can save money. Using the right tools ensures efficiency and safety in repairs. A well-prepared toolkit is essential for any gardener who aims to maintain their equipment in top condition.Wrench Set
A wrench set is crucial for adjusting loose bolts. It allows you to tighten or loosen different sizes of nuts. Look for a set with various sizes for versatility.Screwdriver Set
Screwdrivers help with tightening loose screws. They come in various types like flat-head and Phillips. Always choose a set that includes multiple sizes.Sharpening Stone
A sharpening stone restores the edge of dull blades. It is simple to use and very effective. Regular sharpening keeps tools efficient and safe.Oil Can
An oil can lubricates moving parts. Proper lubrication prevents rust and ensures smooth operation. It is especially useful for tools with hinges.Hammer
A hammer helps in fixing bent tools. It also aids in driving nails. A medium-sized hammer is usually sufficient for most tasks.File
Files are used to smooth rough edges. They help in reshaping damaged metal parts. A set with different shapes and sizes is ideal.Replacement Parts
Keeping spare parts on hand can be beneficial. Items like screws, bolts, and handles are often needed. Stock up on parts that frequently wear out. Having these tools ready makes garden tool repair easier. Proper maintenance extends the life of your equipment. This saves time and money in the long run.Cleaning And Maintenance Tips
Repair garden tools to ensure longevity and efficiency. Begin by cleaning dirt and rust with a wire brush. Sharpen blades using a file or whetstone, and oil moving parts to prevent corrosion.
Cleaning and maintaining garden tools is crucial for their longevity. Regular care ensures they function efficiently and remain in good condition. Dirt and rust can damage tools over time. With proper cleaning and maintenance, you can keep them in top shape. Let’s explore some effective tips to preserve your garden tools.Remove Dirt And Debris
Begin by eliminating dirt and plant residues. Use a stiff brush for this. A damp cloth can also help. Ensure you clean all crevices. This prevents buildup and rust formation.Use Soapy Water For Deep Cleaning
For a thorough clean, use warm soapy water. Submerge tools briefly to loosen grime. Scrub gently with a brush. Rinse well with clean water and dry with a towel.Apply Rust Prevention Techniques
Rust can ruin tools. After cleaning, apply a thin layer of oil. This creates a barrier against moisture. Use linseed oil or mineral oil. Store tools in a dry place for added protection.Sharpen Blades Regularly
Sharp blades work better and safer. Use a file or sharpening stone. Follow the blade angle carefully. Regular sharpening extends tool life and improves performance.Inspect Handles And Fasteners
Check wooden handles for splinters. Sand them smooth if needed. Tighten any loose screws or bolts. Replace damaged parts promptly to ensure safety.Store Tools Properly
Proper storage prevents damage. Hang tools to keep them off the ground. Use racks or hooks. This keeps them dry and organized. Avoid leaving them outside in wet conditions. These cleaning and maintenance tips will keep your garden tools efficient and long-lasting. With minimal effort, your tools will be ready for every gardening season.Sharpening Blades
Sharpening blades is essential for repairing garden tools. Dull blades make gardening harder and less efficient. Use a file or sharpening stone to restore sharpness, ensuring tools cut cleanly and smoothly.
Sharpening blades is essential for maintaining garden tools. Dull blades can damage plants and make work harder. Sharp tools ensure clean cuts and healthy growth. Regular sharpening keeps tools effective and prolongs their lifespan. Knowing how to sharpen properly is vital for any gardener.Choosing The Right Sharpening Tools
Picking the correct sharpening tool is crucial. Each tool serves a different purpose. For larger blades, use a file or a sharpening stone. Small blades may need a whetstone or a diamond file. Ensure the tool matches the blade size and type. Good tools make sharpening easier and more efficient.Techniques For Different Blades
Different blades require different techniques. For straight blades, use long strokes with even pressure. Curved blades need a gentle, circular motion. Keep the original angle of the blade intact. This preserves the blade’s effectiveness. Practice makes perfect when sharpening various blade types.Fixing Loose Or Broken Handles
Secure loose or broken handles on garden tools by tightening screws or replacing the handle if needed. Use epoxy for a strong bond with wooden handles, ensuring they stay firm during use. Regular maintenance extends the life of your tools.
Fixing loose or broken handles on garden tools might seem daunting, but with a little knowledge, you can restore them to their former glory. Whether you’re dealing with a shovel, rake, or hoe, the handle is crucial for functionality. Neglecting a loose or broken handle can lead to inefficiency and frustration. So, why not tackle the repair yourself? You’ll save money, extend the life of your tools, and gain satisfaction from a job well done.Types Of Handles And Their Repair Needs
Understanding the type of handle you’re dealing with is the first step in the repair process. – Wooden Handles: These are common and often require tightening or replacement when they become loose or cracked. They offer a classic look but may need regular maintenance. – Fiberglass Handles: Known for their durability and lightweight nature, fiberglass handles might need repair if they become detached. They can be more challenging to fix due to their material properties. – Metal Handles: Less common but extremely durable, metal handles might require tightening or welding if broken. They are often found in heavy-duty tools. Each type has its specific repair needs, so identifying the handle type is crucial for the correct repair approach.Reattaching Or Replacing Handles
When your tool’s handle is loose, start by checking the attachment point. – Reattaching: If a wooden handle is loose but intact, you can often reattach it using screws or nails. Tighten any existing screws or add new ones to secure the handle firmly. – Replacing: If the handle is beyond repair, replacing it might be your best bet. Measure the tool’s handle length and diameter to find a suitable replacement. Wooden handles are generally easy to replace, while fiberglass might require special tools. Consider the effort involved and ask yourself: is reattaching a feasible option, or is replacement more practical? Taking the time to assess and tackle the repair will ensure your garden tools are ready for action.Dealing With Rust And Corrosion
Repairing garden tools affected by rust and corrosion begins with thorough cleaning. Use a wire brush to remove rust. Apply rust remover solution to dissolve remaining corrosion. Dry the tool completely to prevent future rusting. Finally, apply a coat of lubricant for protection.
Regular maintenance extends the tool’s lifespan.
Dealing with rust and corrosion is crucial for garden tool maintenance. Over time, moisture and dirt can lead to rust on your tools. This affects their performance and lifespan. Addressing rust and corrosion ensures your tools remain effective and durable.Rust Removal Methods
Removing rust can restore your tools to their former glory. Here are simple methods:- Scrub with a wire brush to remove loose rust.
- Soak tools in a vinegar bath to dissolve rust.
- Use baking soda paste for gentle rust removal.
- Apply rust remover products for stubborn areas.
Preventive Measures
Preventing rust prolongs the life of your garden tools. Simple steps can make a big difference:- Store tools in a dry place to avoid moisture.
- Apply a thin layer of oil after cleaning.
- Use silica gel packs to absorb moisture.
- Keep tools clean and dry after use.
Repairing Garden Hoses
Fixing garden hoses is easy and saves money. Check for leaks or cracks. Use hose repair kits for quick fixes and extend hose life.
Repairing a garden hose can save money and reduce waste. Hoses often suffer from leaks, tears, or poor fittings. Knowing how to repair them extends their life. It’s easier than you think.Identifying Common Hose Issues
Hoses can develop various problems over time. Leaks usually occur near the fittings. Kinks and tears appear in the middle sections. Cracks often result from prolonged sun exposure. Identifying the problem is the first step to repairing it.Patch And Seal Techniques
Fixing a garden hose involves simple tools. Follow these steps:- Identify the leak or tear location.
- Dry the hose thoroughly before starting the repair.
- Use a utility knife to cut out damaged sections.
- For minor leaks, apply waterproof tape around the affected area.
- Patch larger holes with a hose repair kit.
- Ensure the patch is secure and sealed tightly.
- Reattach the hose end using a new hose clamp.
Restoring Garden Tool Functionality
Repair garden tools by cleaning and sharpening blades. Tighten loose bolts and replace worn handles. Regular maintenance ensures tools work efficiently, saving time and effort.
Restoring the functionality of your garden tools is like breathing new life into your gardening routine. With a few simple steps, you can transform neglected, rusty tools into trusty gardening companions. Regular maintenance not only extends the lifespan of your tools but also enhances their performance. Are you ready to get your hands dirty and restore your garden tools to their former glory?Tightening Loose Parts
Loose screws or bolts can render a tool ineffective. Begin by inspecting each tool carefully. Check for any wobbly handles or loose blades. Use a screwdriver or a wrench to tighten any loose screws or bolts securely. Sometimes, you might encounter a stripped screw or a worn-out bolt. Replace these with new ones to ensure stability. This small effort can drastically improve the functionality of your tools.Lubricating Moving Components
Friction is the enemy of smooth tool operation. Moving parts such as hinges and blades need regular lubrication. Apply a few drops of machine oil or WD-40 to these components. Ensure you wipe away any excess oil to prevent dust accumulation. Proper lubrication reduces wear and tear, making your tools easier and safer to use. Have you ever experienced a stubborn pair of pruning shears that refuse to budge? Lubricating them can often solve this frustrating problem, restoring them to perfect working order. Regularly maintaining your tools not only saves you money but also enhances your gardening experience. What tools in your shed could use a little TLC today?
Credit: www.youtube.com
Storage Solutions For Longevity
Repairing garden tools ensures they last longer. Clean them thoroughly to remove dirt and rust. Sharpen blades with a file or sharpening stone for better performance. Tighten loose screws and replace worn handles to maintain durability. Regular maintenance keeps tools efficient and ready for use.
Storing garden tools correctly extends their lifespan. Proper storage prevents rust and damage. It also ensures your tools stay sharp and ready.Proper Storage Practices
Store tools in a cool, dry place. Moisture causes rust. Use wall hooks for hanging. Keep blades off the ground. Label shelves for easy access. Consider using a pegboard. It keeps tools organized and visible. Clean tools before storing. Remove dirt and debris. Use a wire brush for stubborn grime. Apply oil to metal parts. It prevents rust. Wooden handles need care too. Sand them lightly and apply linseed oil.Seasonal Storage Tips
Winter needs special care. Store tools indoors. Cold and moisture damage metal. Drain fuel from power tools. It prevents engine issues. Cover larger tools with a tarp. It offers extra protection. In summer, check for pests. They can nest in tool sheds. Store frequently used tools in easy reach. Use silica gel packs. They absorb moisture. Keep your storage area clean. Dust and clutter invite rust. Regular maintenance ensures longevity.
Credit: www.instagram.com
Frequently Asked Questions
How Do I Clean Rusty Garden Tools?
To clean rusty garden tools, use a wire brush or sandpaper to scrub away rust. Soak tools in vinegar overnight for tough rust. Rinse and dry them thoroughly after cleaning. Regular maintenance and proper storage can prevent rust buildup and extend the lifespan of your garden tools.
What Materials Are Needed For Tool Repair?
For tool repair, you’ll need basic materials like sandpaper, a wire brush, lubricant, replacement parts, and screws. Depending on the tool, you might also need a sharpening stone or file. Having these essentials on hand will help you efficiently repair and maintain your garden tools.
How Often Should I Sharpen Garden Tools?
Sharpen garden tools at least once a season, or whenever they become dull. Regular sharpening ensures efficient cutting and reduces strain on plants. Use a sharpening stone or file for best results. Proper maintenance enhances performance and prolongs the life of your garden tools.
What Is The Best Lubricant For Garden Tools?
Use a silicone-based lubricant or WD-40 for garden tools. These lubricants protect against rust and ensure smooth operation. Apply regularly, especially after cleaning and drying. Proper lubrication helps maintain tool functionality and prevents wear and tear over time.
Conclusion
Repairing garden tools can save time and money. Regular maintenance keeps them efficient and safe. Clean tools after use. Oil moving parts for smooth operation. Sharpen blades for better cutting results. Fix broken handles with glue or tape. Replace damaged parts promptly.
Store tools in a dry place to prevent rust. Proper care extends their lifespan. Enjoy gardening with reliable tools. Keep your garden beautiful and thriving. Happy gardening!