Have you ever picked up a garden tool, only to find the handle rough, splintered, or simply uncomfortable? It’s a common issue that many gardeners face.
But there’s good news: you can bring your garden tool handles back to life with a few simple steps. Imagine the satisfaction of transforming those worn-out handles into smooth, durable ones that feel great in your hands. When your tools are comfortable to use, you can focus more on nurturing your garden and less on discomfort.
You deserve tools that work as hard as you do. You’ll discover effective methods to recondition your garden tool handles, ensuring they are ready for many seasons to come. Don’t let neglected handles hold you back—learn how to restore them today!
Choosing The Right Tools
Selecting the right tools is key to reconditioning garden tool handles effectively. Choose sandpaper for smoothing rough surfaces. Opt for linseed oil to nourish and protect wood.
Choosing the right tools for reconditioning garden tool handles can make the process smoother. The correct tools help achieve a professional finish. They also ensure the handles are strong and comfortable to use. Before starting, gather all necessary supplies and equipment. This saves time and ensures safety during the task.Essential Supplies
For a successful reconditioning, essential supplies are necessary. Start with sandpaper, ranging from coarse to fine grit. This helps smooth out rough edges. Wood filler is useful for repairing cracks or splits. Choose a high-quality filler for durability. Linseed oil or a wood sealant is vital for protection and finish. These supplies preserve and enhance the wood’s appearance.Safety Equipment
Safety equipment is crucial for protection during this task. Wear safety goggles to protect your eyes from dust and debris. A dust mask is important to avoid inhaling fine particles. Gloves provide a good grip and protect your hands from splinters. Ensure your workspace is well-ventilated. This prevents inhalation of harmful fumes from wood treatments.Assessing Handle Condition
Garden tools are essential for maintaining a beautiful outdoor space. Over time, their handles can wear out, affecting usability and comfort. Before reconditioning, it’s important to assess the handle’s condition. This ensures you address the right issues and prolong the tool’s lifespan.
Identifying Wear And Damage
Start by closely inspecting the handle. Look for visible cracks or splits. These can weaken the structure, making the tool unsafe to use. Check for signs of rot, especially in wooden handles. Moisture and insects can cause decay, compromising strength. Feel the surface for roughness or splinters. A smooth handle is crucial for comfort and control. Examine the handle’s connection to the tool head. Loose or wobbly joints can lead to accidents.
Determining Repair Needs
Once you’ve identified the damage, decide on the repair approach. Minor cracks might only need glue or filler. This restores integrity without replacing the handle. For rot or severe damage, consider replacing the handle entirely. This ensures safe and efficient usage. If the handle is rough, sanding can smooth it out. This improves grip and prevents blisters during use. Tighten any loose connections to ensure stability. A secure handle enhances control and reduces risk.
Cleaning The Handle
Begin by gently wiping the handle with a damp cloth to remove dirt and debris. Sand the surface lightly to smooth any rough patches. Finish by applying a coat of linseed oil to nourish and protect the wood.
Cleaning the handle is a vital step in reconditioning garden tools. A well-maintained handle not only improves the tool’s appearance but also ensures a comfortable grip. Over time, dirt, grime, and rust can accumulate, impacting the tool’s performance. Let’s explore how to effectively clean the handle to restore its original charm.Removing Dirt And Grime
Start by wiping the handle with a damp cloth to remove surface dirt. For stubborn grime, use a mild soap solution. Dip a sponge into the solution and scrub gently. Pay special attention to grooves and crevices. Rinse with clean water and dry thoroughly to prevent moisture damage.Dealing With Rust
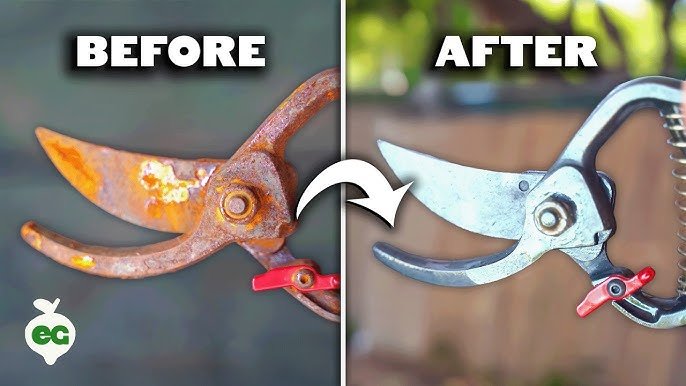
Rust can weaken the handle and affect usability. To tackle rust, mix baking soda with water to form a paste. Apply the paste to rust spots using a soft brush. Let it sit for 20 minutes, then scrub off. For severe rust, consider using sandpaper. Gently sand until the rust is gone, revealing the clean surface underneath.
Credit: www.instagram.com
Sanding For Smoothness
Sanding is essential for making garden tool handles smooth. Over time, handles can become rough and uncomfortable to hold. Sanding them can restore their smoothness and make gardening more enjoyable. This section will guide you through selecting the right sandpaper grit and effective sanding techniques.
Selecting Sandpaper Grit
Choosing the right sandpaper grit is important for a smooth finish. Start with a coarse grit like 80 to remove rough spots. As the surface becomes even, switch to finer grits. Use 120 grit for smoothing out the surface. Finish with 220 grit for the final polish. This progression ensures a silky-smooth handle.
Sanding Techniques
Proper sanding techniques are crucial for effective results. Begin by securing the tool handle. Use a clamp or hold it firmly. Sand in the direction of the wood grain. This prevents scratches and gives a smooth finish. Apply even pressure and move the sandpaper in long strokes. Check the surface regularly to avoid over-sanding. Wipe the handle with a damp cloth to remove dust before switching grits.
Repairing Cracks And Splinters
Repairing cracks and splinters in garden tool handles can extend their life. Sand the handle to remove rough edges. Apply wood filler to fill cracks and splinters, then sand again for a smooth finish. Seal the handle with linseed oil to protect it from moisture and ensure durability.
Repairing the handles of your garden tools is like rejuvenating an old friend. Cracks and splinters can make your tools uncomfortable and unsafe to use. Addressing these issues not only enhances the tool’s lifespan but also improves your gardening experience. Imagine gripping a smooth handle, free from the worry of splinters or sudden breaks. Let’s dive into how you can achieve that with some straightforward techniques.Filling Cracks
Cracks in tool handles are common, especially if they’ve been stored in damp conditions. Start by cleaning the handle thoroughly. Use a brush to remove dirt and debris from the cracks. Once clean, fill the cracks with a wood filler or epoxy. Opt for a product that matches the handle’s color for a seamless look. Apply it with a putty knife, ensuring it fills the crack completely. Let the filler dry as per the manufacturer’s instructions. Once dry, sand the area lightly to ensure smoothness. This step is crucial for comfort during use.Smoothing Splinters
Splinters can be pesky and painful, but they’re easy to fix. Begin by identifying the splintered areas on the handle. Sand these spots gently with fine-grit sandpaper. Always sand in the direction of the wood grain to avoid further damage. This helps in maintaining the integrity of the handle. After sanding, wipe the handle with a damp cloth to remove dust. Consider applying a layer of linseed oil or wood conditioner. This not only smooths the surface but also protects the wood from future damage. By taking these simple steps, you can transform your garden tools, making them safe and pleasurable to use. What’s your favorite tool that could benefit from a little handle TLC?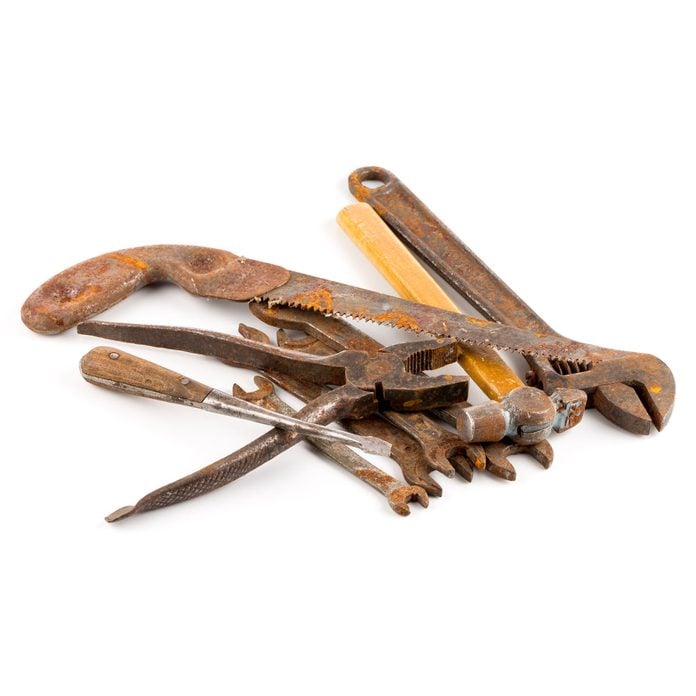
Credit: www.familyhandyman.com
Applying Protective Finish
Applying a protective finish to garden tool handles enhances their durability. Use linseed oil or beeswax for best results. Regular maintenance keeps handles smooth and resistant to weather damage.
Applying a protective finish to garden tool handles extends their life. It shields them from moisture, dirt, and wear. A well-applied finish enhances grip and appearance. This process ensures your tools stay in top condition. Let’s explore how to choose and apply the right finish.Choosing The Right Finish
Selecting the right finish is crucial. Various options are available for tool handles. Linseed oil is a popular choice. It’s natural and provides excellent protection. Tung oil is another option. It penetrates deeply, enhancing durability. Polyurethane offers a tough, glossy finish. It resists scratches and moisture. Consider the handle’s material. Wood handles benefit from oils. Metal handles might need polyurethane or similar finishes. Personal preference also plays a role. Think about appearance and feel.Application Methods
Applying the finish requires care. Start by cleaning the handle. Remove any dirt or old finish. Use sandpaper to smooth the surface. Wipe away dust with a damp cloth. For oil finishes, use a clean rag. Apply a thin layer evenly. Let it soak for 15 minutes. Wipe off excess with a dry cloth. Allow it to dry completely. For polyurethane, use a brush. Apply a thin, even coat. Let it dry according to instructions. Sand lightly between coats for a smooth finish. Apply two or three coats for best results.Reattaching The Handle
Secure the new handle with screws or nails. Ensure the fit is snug for optimal grip and performance.
Reattaching the handle of a garden tool is crucial. It ensures your tools function effectively. A loose handle can be dangerous and inefficient. Proper reattachment gives your tools a new lease on life.Ensuring A Secure Fit
Check the handle’s size. It should match the tool’s socket. A snug fit prevents wobbling. Sand down the handle if it’s too large. Use a wood rasp for precision. Clean the socket of dirt and debris. This ensures a tight connection. Insert the handle firmly into the socket. Tap gently with a rubber mallet for a secure fit. Use wood glue for added strength. Apply a thin layer around the socket. Let it dry completely before use.Testing For Stability
Test the reattached handle’s stability. Hold the tool upright. Shake it gently. Listen for any rattles. A stable handle stays firm. Inspect the tool while testing. Look for gaps between the handle and socket. Use your tool on soft ground first. This checks for any loose connections. If the handle shifts, recheck the fit. Adjust as needed for safety.
Credit: www.youtube.com
Maintenance Tips
Reconditioning garden tool handles involves cleaning, sanding, and applying oil to enhance durability and grip. Regular maintenance prevents splintering and extends the life of your tools. Use linseed oil for a polished finish and protection against moisture.
Maintaining your garden tool handles ensures they last longer and perform better. Regular care prevents wear and tear, keeping tools safe and effective. Here’s how to maintain your garden tool handles effectively:Regular Inspections
Check handles for cracks or splinters every few weeks. This helps identify potential issues early. Look for signs of wear, like loose fittings or rot. Use sandpaper to smooth any rough spots on wooden handles. This prevents splinters and keeps the surface clean. For metal handles, watch for rust. Remove it with a wire brush if needed.Proper Storage
Store tools in a dry place to avoid moisture damage. Moisture can cause wood to swell and metal to rust. Hang tools on hooks to keep them off the ground. This prevents damage from moisture and dirt. Use a rack or pegboard for easy organization. This helps you find tools quickly and keeps handles in good condition. Avoid leaving tools outside overnight. Weather can damage both wood and metal handles.Frequently Asked Questions
How Do I Clean Wooden Garden Tool Handles?
To clean wooden handles, use mild soap and water. Scrub gently with a soft brush to remove dirt. Rinse thoroughly and dry completely. Avoid soaking the wood, as this can cause swelling and damage. Regular cleaning keeps handles in good condition.
What Materials Are Best For Reconditioning?
Use linseed oil for wooden handles. It’s effective and easy to apply. For metal handles, use rust-resistant paint. These materials protect and enhance durability. Always ensure the surface is clean before application for best results.
Can I Use Sandpaper On Tool Handles?
Yes, sandpaper is perfect for smoothing rough handles. Start with coarse grit and finish with fine grit for a polished surface. Sanding removes splinters and prepares the surface for reconditioning. Always follow with protective oil or paint.
How Often Should I Recondition Handles?
Recondition handles annually or when they show signs of wear. Regular maintenance extends the life of your tools. Check handles for splinters, cracks, and wear. Address these issues promptly to maintain functionality and safety.
Conclusion
Reconditioning garden tool handles is simple and rewarding. With a few steps, your tools look new. Sanding and oiling bring back their shine and strength. Regular maintenance extends their life. You save money and reduce waste by reusing old tools.
A little effort goes a long way. Plus, you enjoy gardening more with comfortable tools. So, take some time today. Show your tools some love and care. Your garden and wallet will thank you. Embrace the satisfaction of doing it yourself.
Happy gardening!