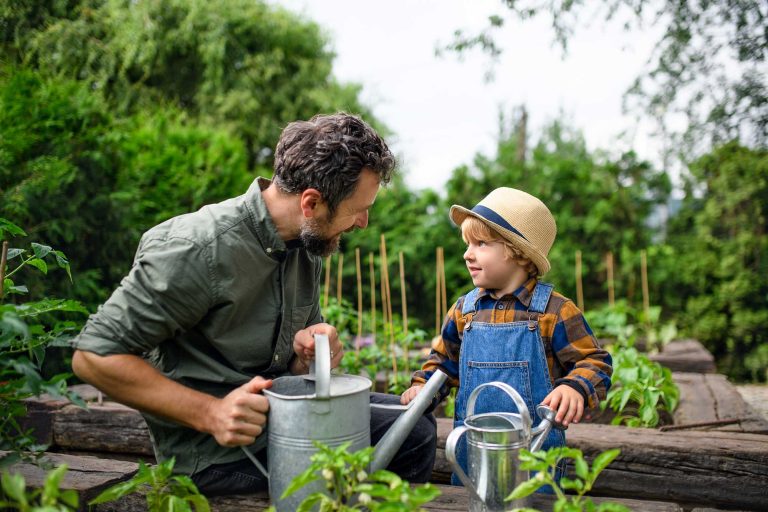
Imagine stepping into your garden and being greeted by vibrant blooms and lush greens, all nestled in charming wooden planters. Creating your own wooden garden planter isn’t just a task; it’s an opportunity to infuse your outdoor space with personality and warmth.
You don’t need to be a woodworking expert to accomplish this; with a few tools and some simple steps, you can craft a planter that perfectly suits your style and needs. In this guide, you’ll discover the secrets to building a wooden garden planter that enhances your garden’s beauty and stands the test of time.
Whether you’re looking to save money, customize your garden space, or simply enjoy the satisfaction of DIY, this project is your ticket to achieving all that and more. As you follow along, you’ll find that making a wooden garden planter is easier than you think and infinitely rewarding. Get ready to transform your garden into a haven of tranquility and charm.
Materials And Tools Needed
Creating a wooden garden planter requires basic materials and tools. Gather wooden planks, nails, a saw, and a hammer. Ensure you have a measuring tape and sandpaper for smooth edges.
Creating a wooden garden planter is a rewarding DIY project that can enhance the beauty of your garden. Before you start, gathering the right materials and tools is essential for a smooth and successful build. With the right items on hand, your project will not only be more efficient but also enjoyable.Wood Selection
Choosing the right type of wood is crucial. Cedar and redwood are excellent options due to their natural resistance to rot and insects. If you’re on a budget, pressure-treated pine can be a good alternative, though it requires more maintenance.Essential Tools
Having the right tools makes the process more manageable. A saw, preferably a miter saw, is necessary for cutting the wood to size. You’ll also need a drill with various bits for making pilot holes and inserting screws.Fasteners And Connectors
Use galvanized screws to prevent rusting and ensure the longevity of your planter. Brackets or corner braces can provide additional support and stability to the structure.Measuring And Marking Tools
Accuracy is key in any woodworking project. A measuring tape and a carpenter’s square are essential for ensuring your cuts and angles are precise. A pencil or a chalk line is useful for marking your wood before cutting.Protective Gear
Safety should never be an afterthought. Wear safety glasses to protect your eyes from wood dust and flying debris. Ear protection is also recommended when using power tools.Optional Accessories
Consider adding a liner to your planter to extend its life. A plastic or landscape fabric liner can help protect the wood from moisture. Adding casters to the bottom can make your planter mobile, allowing you to rearrange your garden with ease. Have you ever thought about the satisfaction of building something with your own hands? By preparing with the right materials and tools, you set yourself up for not just a successful project, but an enjoyable experience too.Choosing The Right Wood
Selecting the right wood ensures a durable wooden garden planter. Cedar and redwood resist rot and insects, making them ideal choices. Properly treated pine is another affordable option for longer-lasting planters.
Choosing the right wood for your garden planter can be a game-changer. The type of wood you select impacts not only the aesthetics of your planter but also its durability and resistance to the elements. You wouldn’t want to spend hours crafting a beautiful piece only to watch it warp or rot after a season.Consider The Environment
Before selecting wood, think about your local climate. Is it humid, dry, or prone to heavy rainfall? If you live in a rainy area, choose woods like cedar or redwood, known for their natural resistance to moisture and decay. In contrast, if you’re in a dry region, you might opt for pine or spruce, which can be treated to endure the elements.Durability Matters
Durability is key for a garden planter that lasts. Hardwoods like teak and oak are incredibly tough and resistant to pests. They might be pricier, but their longevity can make them a worthwhile investment. Do you want to build a planter that lasts for years without much maintenance? Then go for hardwoods.Sustainability Counts
Opt for woods sourced sustainably. Many suppliers now offer certified wood that ensures minimal impact on the environment. Bamboo is a fast-growing alternative that provides durability and is eco-friendly. Choosing sustainable wood not only helps the planet but also gives you peace of mind.Cost Versus Quality
Balancing cost and quality can be tricky. While treated pine is affordable and easily accessible, it might not offer the longevity of more expensive options. Consider your budget and how much you’re willing to invest in your planter. Sometimes spending a bit more upfront saves you from repairs and replacements down the line.Aesthetic Appeal
Wood adds a natural beauty to your garden. Think about the color and grain patterns you prefer. Woods like mahogany offer rich, deep tones that can complement vibrant plants. Meanwhile, lighter woods such as ash can brighten up shaded garden corners. What visual impact do you want your planter to have in your garden? Your choice of wood can define the success of your garden planter project. Selecting wisely will ensure your planter not only looks good but stands the test of time.Measuring And Cutting Wood
Accurate measurements ensure your garden planter fits perfectly. Use a tape measure to mark dimensions on the wood. Carefully cut along the marked lines using a saw for precise pieces.
Creating a wooden garden planter is a rewarding DIY project that can transform your outdoor space. One of the most crucial steps in this process is measuring and cutting the wood accurately. Getting these measurements right ensures your planter will be sturdy and long-lasting. It can be the difference between a planter that stands the test of time and one that quickly deteriorates. Let’s dive into how you can do this with precision and ease.Understanding Your Measurements
Before you even pick up a saw, it’s essential to have a clear plan. Sketch out your planter design, noting the dimensions carefully. Consider the types of plants you intend to grow, as this will influence the depth and width of your planter. Use a tape measure to double-check your dimensions against your sketch. Accuracy now saves time and frustration later. Not all wood is created equal. Select a type that is durable and suitable for outdoor use, like cedar or redwood. These woods are naturally resistant to rot and insects. Visit your local lumberyard and discuss your project with the experts there—they might offer valuable advice you hadn’t considered.Marking Your Cuts
Once you’ve selected your wood, it’s time to mark your cuts. Use a carpenter’s pencil and a straight edge to draw clear, precise lines where you’ll cut. Double-check these lines against your measurements. It’s often helpful to mark the pieces with letters or numbers to avoid confusion during assembly.Safety First
Cutting wood can be dangerous if not done correctly. Always wear safety goggles and gloves to protect yourself. Ensure your workspace is clear and well-lit. A stable workbench will give you the support you need to make clean cuts. Safety should always be your top priority.Cutting The Wood
Now it’s time to make your cuts. Use a saw that you are comfortable with, whether it’s a hand saw for more control or a power saw for efficiency. Follow the lines you marked earlier, taking your time to ensure accuracy. If you’re new to woodworking, practice on a scrap piece to build confidence.Double-check Fit
After cutting, lay out the pieces to ensure they fit together as planned. This is your chance to make any adjustments before assembly. Check each piece against your original measurements. Ask yourself: does everything line up as it should? A quick re-measure can catch any small errors before they become big problems. By following these steps, you’ll be well on your way to creating a beautiful and functional garden planter. Are you ready to see your garden come to life with your own handmade creation?
Credit: www.oliveandjunehome.com
Assembling The Planter Frame
Assembling the planter frame requires aligning the wooden pieces precisely. Secure each piece using screws for stability. Ensure the corners are tight and square to maintain the planter’s shape.
Assembling the planter frame is a crucial step in creating your wooden garden planter. This process involves connecting the pieces of wood to form a sturdy structure. You need to ensure that each part fits perfectly. This will guarantee the durability of your planter. Below are some key steps to guide you in assembling the planter frame.Gather Your Tools And Materials
Before starting, collect all necessary tools and materials. You will need a hammer, nails, and a measuring tape. Ensure the wood pieces are cut to the right size. Having everything ready will make the process smoother.Measure And Mark The Wood
Use a measuring tape to check the dimensions. Mark the spots where you will join the pieces. Accurate measurements prevent mistakes. This step ensures the planter is balanced.Align The Wood Pieces
Place the wood pieces on a flat surface. Align them according to your design. Make sure all pieces fit snugly together. Proper alignment is key to a strong structure.Nail The Corners Together
Use nails to secure the corners of the frame. Hammer the nails carefully to avoid splitting the wood. This will hold the frame tightly. Check each corner to ensure stability.Reinforce With Additional Support
Add extra pieces of wood to reinforce the frame. These supports increase durability. Ensure they are evenly distributed. Your planter will withstand weight and weather conditions.Check The Frame For Stability
Once assembled, test the frame for stability. Gently shake it to see if it wobbles. Make adjustments if needed. A stable frame will last longer in your garden.Securing The Base
Securing the base of a wooden garden planter is crucial for stability. Use sturdy wood and ensure it is well-fitted. Proper alignment prevents soil leakage and maintains structural integrity.
Securing the base of your wooden garden planter ensures its stability. A solid base keeps the planter sturdy during windy weather. It also helps in better drainage, promoting healthier plants. Follow these steps to create a firm foundation for your planter.Materials Needed For The Base
Gather the right materials before starting. You need durable wooden planks for a strong base. Use weather-resistant screws to hold everything together. A power drill will make the task easier and quicker. Grab a measuring tape for precise cuts and placements.Measuring And Cutting The Wood
Measure the dimensions of your planter. Ensure the base fits snugly within the frame. Use the measuring tape for accuracy. Cut the wooden planks according to the measurements. A saw will help in making clean cuts. Double-check each piece before proceeding.Positioning The Base Planks
Place the cut planks inside the planter frame. Arrange them evenly to cover the entire bottom. Leave small gaps between planks for water drainage. This helps prevent root rot in plants. Ensure each plank is level and aligned.Securing The Planks With Screws
Use weather-resistant screws to attach the planks. Drive screws into each end of the plank. Ensure screws are tight for a secure hold. A power drill will make this process faster. Check each plank to ensure it doesn’t move.Testing The Stability Of The Base
Gently shake the planter to test stability. Ensure there is no wobbling or movement. Adjust any loose screws if needed. The base should feel solid and firm. This step ensures your planter will withstand outdoor conditions.Adding Drainage Holes
Ensure proper drainage by creating holes at the bottom of your wooden garden planter. Use a drill to make evenly spaced holes. This prevents water buildup and promotes healthy plant growth.
Adding drainage holes is crucial for a wooden garden planter. They prevent waterlogging, ensuring plants receive just the right amount of moisture. Without these, roots can rot, and plants may suffer. Proper drainage keeps your garden flourishing and healthy.Understanding The Importance Of Drainage
Plants need air around their roots. Waterlogged soil suffocates them. Good drainage keeps soil aerated. It helps avoid root diseases and promotes growth.Choosing The Right Drill Bit
Select a drill bit suitable for wood. It should be slightly larger than your screw size. This ensures the holes allow water to escape easily.Positioning The Holes
Distribute holes evenly across the bottom. Space them around six inches apart. This ensures uniform drainage throughout the planter.Creating The Holes
Use a power drill for efficiency. Start slowly to avoid splitting the wood. Drill all the way through for best results.Checking For Smooth Edges
Inspect the edges of each hole. Rough edges can snag roots. Sand them down for a smooth finish.Testing The Drainage
Pour water into the planter. Ensure it drains quickly and evenly. Adjust hole size if necessary.Sanding And Finishing
Smooth the planter’s surface with sandpaper for an even finish. Apply a clear coat or wood stain for protection and visual appeal.
Creating a wooden garden planter involves more than just assembling pieces of wood. Sanding and finishing are crucial steps that ensure your planter not only looks beautiful but also stands up to the elements. This part of the process can make a big difference in the durability and appearance of your planter. Imagine the satisfaction of seeing a smooth, polished surface that enhances the natural beauty of the wood. Let’s dive into how you can achieve that with proper sanding and finishing techniques.Choosing The Right Sandpaper
Selecting the right sandpaper is essential for achieving a smooth finish. Start with a coarser grit like 80 to remove any rough edges or splinters. Progressively move to finer grits, such as 120 and 220, for a silky-smooth surface. Don’t rush through this. Feel the wood as you go, ensuring it’s smooth to the touch. This tactile feedback is your best guide.Sanding Techniques For A Smooth Finish
Use a sanding block for even pressure and to avoid creating grooves. Sand along the wood grain to prevent scratches. Pay special attention to corners and edges, where roughness often hides. Consider using a dust mask to protect yourself from inhaling fine particles. Sanding can be dusty work, but it’s worth it for the end result.Applying The First Coat Of Finish
After sanding, wipe the wood with a damp cloth to remove dust. Choose a finish that suits your style and the planter’s environment, like a weatherproof sealant or a natural oil. Apply the finish with a brush or cloth, following the grain of the wood. Allow it to dry completely before deciding if another coat is necessary.Polishing For A Professional Look
Once the finish has dried, lightly sand the surface with a very fine grit sandpaper, around 400 grit. This step helps the final coat adhere better and look smoother. Apply a second coat of finish for added protection and shine. Your planter will not only look professional but will also be ready to withstand outdoor conditions.Maintaining Your Wooden Planter
Regular maintenance keeps your planter looking fresh and prevents damage. Check the finish every season and reapply as needed. This simple upkeep ensures your hard work lasts for years. Isn’t it satisfying to know that with a little care, your creation will remain a garden highlight?Applying Weatherproofing
Protect your wooden garden planter by applying a weatherproof sealant. This prevents damage from rain and sun. Ensure long-lasting durability and vibrant appearance.
Applying weatherproofing to your wooden garden planter is crucial. This process helps protect the wood from rain, snow, and sun. Without it, your planter may rot or fade quickly. Weatherproofing ensures your planter lasts for years. It’s a simple step that adds durability and beauty. Let’s explore how to apply weatherproofing effectively.Choosing The Right Weatherproofing Product
Select a product designed for outdoor wood. Look for sealants labeled as waterproof or water-resistant. These products will repel moisture and prevent damage. Always check the label for application instructions. Some may require multiple coats for full protection.Preparing The Surface
Start with a clean, dry planter. Dust and dirt can prevent proper adhesion. Use a brush or cloth to remove debris. Sand the surface lightly if needed. This helps the sealant stick better. A smooth surface ensures even application.Applying The Sealant
Apply sealant evenly with a brush or roller. Cover all areas, including corners and edges. Work in thin layers for best results. Thick layers may not dry evenly. Allow each coat to dry fully before adding another. Follow the product’s drying time instructions.Ensuring Complete Coverage
Double-check all areas for missed spots. Corners and edges are easy to overlook. Use a smaller brush for detail work. A thorough application prevents water from seeping in. Proper coverage is key to long-lasting protection.Testing The Weatherproofing
After the sealant dries, test its effectiveness. Sprinkle water on the surface. Water should bead up and roll off. If it absorbs, apply another coat. This test ensures your planter is ready for the elements.Maintaining The Weatherproofing
Regularly check the planter for signs of wear. Reapply sealant as needed. Over time, weather can weaken the protection. Keeping up with maintenance extends the life of your planter. It’s a small task that offers big rewards.Final Assembly And Inspection
Final assembly and inspection ensure your wooden garden planter is sturdy and safe. Check all joints and edges for any flaws. Smooth out any rough surfaces for a polished finish.
Final assembly and inspection are crucial steps in building your wooden garden planter. You’ve cut, sanded, and prepared all your pieces; now it’s time to bring them together. This stage is about ensuring everything fits perfectly and stands the test of time.Align And Connect The Pieces
Start by laying out all the wooden pieces on a flat surface. Make sure each piece aligns perfectly with its counterpart. Use screws or nails to connect the sides and base, ensuring they are tightly secured. Double-check the corners for 90-degree angles. A quick tip: use a carpenter’s square to achieve precise alignment. This step is vital for structural integrity.Reinforce For Durability
Consider reinforcing joints with wood glue for added strength. Apply the glue along the edges before screwing the parts together. Don’t skip this step if you want your planter to endure harsh weather conditions. Your planter will remain sturdy and reliable for many seasons.Inspect For Imperfections
Take a moment to inspect your handiwork. Run your fingers along the edges and surfaces to detect any rough spots. Are there any protruding nails or screws? Sand them down or adjust as necessary to ensure a smooth finish.Seal And Protect
Once satisfied with the assembly, apply a sealant to protect the wood. Choose a waterproof sealant to guard against moisture and extend the life of your planter. Your plants will thrive in a well-protected environment, safe from rot and decay.Test Stability
Gently shake the planter to test its stability. Does it wobble? If yes, tighten any loose screws or add extra support at the base. A stable planter not only looks professional but also ensures your plants are safe. Crafting your planter is a rewarding journey. What creative projects will you tackle next?Positioning In The Garden
Select a sunny spot for your wooden garden planter to thrive. Ensure the location has good drainage and is easily accessible for regular care. Proper positioning enhances growth and adds aesthetic appeal to your garden space.
Positioning your wooden garden planter in the perfect spot can enhance its beauty and maximize its effectiveness. Whether you’re looking to create an eye-catching focal point or ensure optimal plant growth, the location you choose can make all the difference. Consider factors like sunlight exposure, accessibility, and aesthetic appeal as you decide on the placement of your planter.Sunlight Exposure
Understanding the sunlight needs of your plants is crucial. Most vegetables and flowering plants thrive in full sun, requiring at least 6-8 hours of direct sunlight daily. Before placing your planter, observe different areas of your garden throughout the day to identify the sunniest spots. Is there a particular corner that basks in sunlight during the afternoon?Accessibility
Ease of access can significantly impact your gardening experience. Place your planter where you can conveniently water and tend to the plants. If you have limited mobility or a busy schedule, positioning it near a walkway or entrance can save you time and effort. Additionally, consider the proximity to water sources for hassle-free irrigation.Visual Appeal
Aesthetics play a vital role in garden design. You might want your planter to be the star attraction or subtly complement existing features. Experiment with different angles and positions to see where it blends best with your garden’s layout. Could it bring life to a dull corner, or create a beautiful symmetry with other elements?Microclimate Considerations
Every garden has microclimates—areas with slightly varying conditions. Some spots might be warmer due to nearby structures, or cooler due to shade from trees. Place your planter in areas that offer the best conditions for your plants. Have you noticed a particular area where plants seem to flourish?Protection From Elements
Wind, rain, and extreme temperatures can affect plant health. Position your planter in a sheltered location if your garden is prone to harsh weather. Using fences or walls as windbreaks can shield your plants, providing them with a stable environment to grow. By carefully considering these factors, you can ensure that your wooden garden planter becomes a thriving part of your garden. Where will you place yours for the best results?Planting Tips
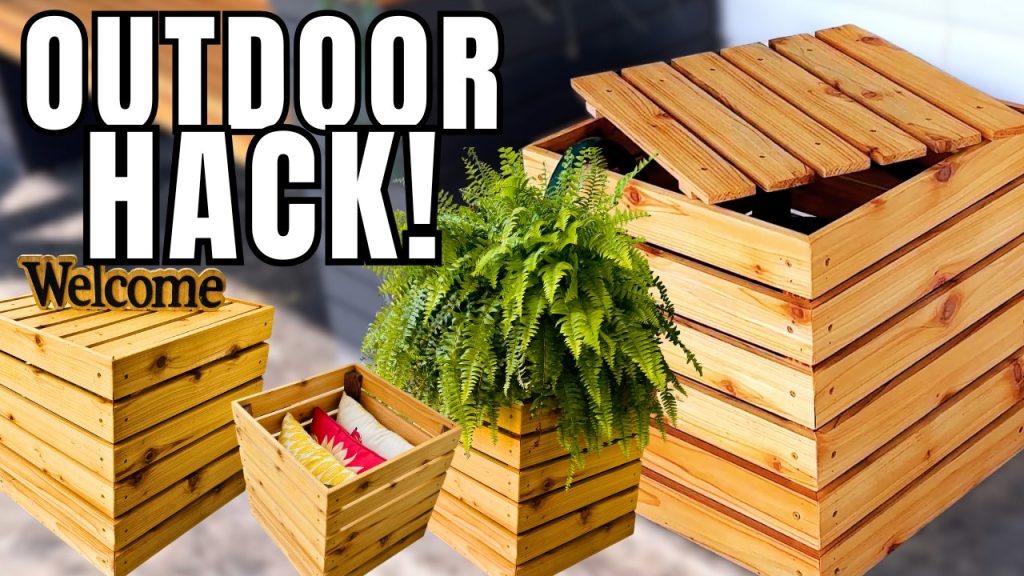
Create a beautiful wooden garden planter by selecting quality wood and cutting it to desired size. Secure the pieces together with screws, ensuring stability and durability. Add a protective finish to withstand weather conditions, then fill with soil and plant your favorite flowers or vegetables.
Planting Tips Creating a wooden garden planter is just the first step. Now, let’s dive into the art of planting. Knowing how to plant correctly can make all the difference. Healthy plants depend on good planting techniques. Use these tips to fill your planter with life.Choose The Right Soil
The soil is crucial for plant growth. Use potting mix for optimal results. It provides nutrients and proper drainage. Avoid garden soil; it may compact over time.Consider Plant Spacing
Space plants correctly to allow room for growth. Crowded plants compete for nutrients and light. Follow spacing guidelines on seed packets or plant labels.Water Wisely
Water is essential but overwatering harms plants. Check soil moisture before watering. Stick your finger in the soil; if dry, it’s time to water.Fertilize Periodically
Plants need nutrients to thrive. Use organic fertilizer to feed them. Apply every few weeks for healthy growth.Rotate Plants Seasonally
Different plants flourish in different seasons. Rotate seasonal plants for a lively planter all year. Learn which plants suit spring, summer, fall, and winter.Pest Control
Keep an eye out for pests. Use natural remedies like neem oil. They protect plants without harming the environment. By following these planting tips, your garden planter will thrive beautifully.
Credit: diyhuntress.com

Credit: www.youtube.com
Frequently Asked Questions
What Materials Are Needed For A Garden Planter?
To make a wooden garden planter, you’ll need wood, screws, a saw, a drill, sandpaper, and wood finish. Choose weather-resistant wood like cedar or redwood for durability. These materials ensure your planter is sturdy, long-lasting, and perfect for enhancing your garden space.
How Do I Choose The Right Wood?
Choose durable and weather-resistant wood like cedar, redwood, or pressure-treated pine. These types resist decay and insects, ensuring your planter lasts longer. Consider the aesthetic you want and the planter’s location in your garden for the best results.
Can Beginners Make Wooden Garden Planters?
Yes, beginners can make wooden garden planters with basic tools and materials. Follow a simple plan, and take your time with measurements and cuts. With patience and practice, even novices can create beautiful and functional planters.
How Do I Ensure Proper Drainage?
To ensure proper drainage, drill holes at the bottom of your planter. This prevents waterlogging and promotes healthy plant growth. Adding a layer of gravel or stones can also help with drainage and prevent soil from clogging the holes.
Conclusion
Building a wooden garden planter brings beauty to any outdoor space. It’s a simple project that offers great satisfaction. With basic tools and materials, you can craft a sturdy planter. Your plants will thrive, adding life and color. Remember to measure carefully and choose quality wood.
Sand edges for safety and a neat finish. Seal the wood to protect it from weather. Your garden will become a peaceful retreat. Enjoy the fruits of your labor. Share your creation with friends and family. A wooden planter is not just functional.
It’s a personal touch to your garden.