Imagine stepping into your garden and being greeted by a stunning, flowing design that guides your eyes effortlessly across your outdoor space. A curved garden border can transform an ordinary garden into an extraordinary masterpiece, inviting you to explore every nook and cranny.
Are you ready to elevate your garden’s aesthetic and make it truly unique? Designing a curved garden border is easier than you might think, and the results can be breathtaking. You’ll discover simple yet effective techniques to create that perfect curve, enhancing your garden’s charm and character.
We’ll unravel the secrets that make curved designs so appealing and show you how to bring a touch of elegance and harmony to your outdoor oasis. So, grab your gardening gloves and let’s dive into how you can craft a beautiful curved garden border that will captivate every visitor and give you a sense of pride every time you step outside.
Planning Your Curved Garden Border
Planning your curved garden border is the first step in transforming your outdoor space into a charming oasis. The fluidity of curves can add a sense of movement and elegance, contrasting beautifully with the rigid lines often found in traditional gardens. Whether you’re designing for aesthetics, functionality, or both, thoughtful planning ensures your garden border enhances your landscape effectively.
Choosing The Right Location
Where you place your curved border can significantly impact the overall look and feel of your garden. Consider areas that naturally lend themselves to curves, like the edges of pathways or the perimeter of a patio. Look for spots where the curve can accentuate existing features, like a tree or a water feature.
Remember, the location sets the tone for the rest of the garden. Think about the sunlight, soil quality, and accessibility. Will the location receive enough light for the plants you want? Is the soil rich enough to support them? Answering these questions early can save you from future headaches.
Considering The Garden’s Style
Your garden’s style should reflect your personality and complement your home. Are you aiming for a modern look or a more traditional, rustic feel? The style you choose will guide the curve’s design, affecting its size and shape.
If your home has a sleek, contemporary design, a gentle curve with minimalistic plants might be ideal. Alternatively, a cottage-style home could benefit from a whimsical, flowing border filled with colorful flowers. Let your garden style dictate how your curved border evolves.
Measuring And Marking The Curve
Accurate measurement is crucial for creating a visually pleasing curve. Use a garden hose or rope to outline the curve on the ground. This flexible approach allows you to tweak the curve until it feels just right.
Once you’re satisfied with the shape, mark the curve using spray paint or flour. This step ensures precision when digging and planting. It’s a simple yet essential task that sets the foundation for your border’s success.
Have you considered using a garden app to visualize your design? Technology can offer surprising insights and help perfect your curve before lifting a shovel.
Materials For Curved Borders
Creating a beautiful curved garden border involves choosing the right materials. Each material offers unique benefits and aesthetics. Consider your garden’s theme and budget before making a decision.
Natural Stone Options
Natural stones add a rustic charm to garden borders. They come in various shapes and colors. You can use them to create a stunning visual effect. Popular choices include slate, granite, and limestone. These stones are durable and weather-resistant. They require little maintenance and blend well with nature.
Brick And Concrete Alternatives
Bricks provide a classic and neat appearance. They are available in a range of colors and sizes. You can lay them in different patterns for a unique look. Concrete offers versatility and strength. It can be molded into any shape or size. Concrete can also be colored or textured to match your style.
Wooden Edging Choices
Wood adds a natural and warm touch to borders. It is easy to cut and shape into curves. Common types include cedar, pine, and redwood. These woods resist rot and pests. You can treat them for extra durability. Wooden edging complements many garden styles and themes.
Tools For The Job
Designing a curved garden border requires the right tools. Use a garden hose to outline the curve. A spade helps cut into the soil along the marked line. For a neat edge, a half-moon edger is essential. These tools ensure a clean and elegant garden design.
Designing a curved garden border can transform your outdoor space, giving it a more organic and natural feel. To bring your vision to life, you’ll need the right tools for the job. Having the correct equipment not only makes the task easier but also ensures precision and safety.Essential Equipment
To start with, a garden hose is incredibly helpful. Lay it down where you envision the curve to get a sense of shape and flow. It’s flexible and easy to adjust, making it ideal for this purpose. You’ll also need a spade or edging tool to cut into the soil along your marked curve. A string line can help you maintain consistency in height, ensuring your border looks even throughout. Don’t forget about a wheelbarrow for transporting materials like soil, mulch, or stones. It’s a real back-saver and keeps your progress smooth.Safety Gear
Safety should never be an afterthought. Start with a good pair of gardening gloves to protect your hands from blisters and sharp objects. If you’re working with stone or heavy materials, wear steel-toed boots to safeguard your feet. Eye protection is also crucial, especially if you’re hammering stakes or using any power tools. Consider wearing knee pads if you’ll be spending a lot of time on the ground. Your knees will thank you after a long day of creating the perfect curve. By equipping yourself with the right tools and safety gear, you set the stage for a successful and enjoyable garden project. Have you gathered everything you need for your garden border adventure? It’s time to get started!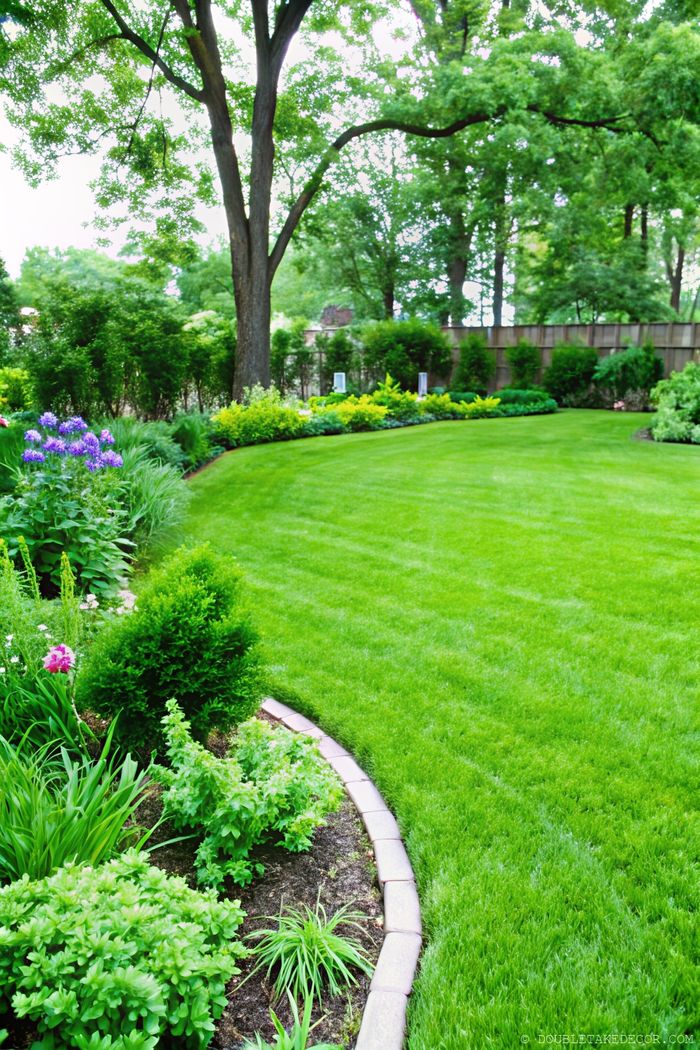
Credit: doubletakedecor.com
Creating The Curve
Enhance your garden with stylish curved borders. Choose flexible materials like metal or plastic edging for smooth curves. Sketch the design on paper to visualize the layout before digging and installing the border.
Creating a beautiful curved garden border can add a touch of elegance and uniqueness to your outdoor space. Curves create a sense of flow, guiding the eye and enhancing the overall design. The process of crafting these curves requires a careful blend of creativity and precision. Whether you’re a seasoned gardener or a beginner, understanding how to create a smooth, natural curve is key to achieving a stunning garden border. Let’s dive into the essential steps to bring your vision to life.Drawing The Curve
Start by visualizing the curve you want. Imagine how it will fit within the existing landscape. Use a flexible hose or rope to lay out the curve on the ground. This allows you to adjust and perfect the shape before committing. Once you’re satisfied with the curve, mark it with spray paint or chalk. This will guide you during the cutting and shaping process. Remember, curves can be gentle or dramatic—choose what best complements your garden’s style. Consider the plants and features that will line this border. Will the curve enhance their beauty? Will it create a dynamic flow in your garden? Keep these questions in mind as you finalize the design.Cutting And Shaping The Materials
Select the right materials for your garden border. Common choices include stone, brick, or wood. Each offers a unique aesthetic and durability; choose what aligns with your vision and budget. Cut your materials to fit the curve using appropriate tools. For stones or bricks, a masonry saw can make precise cuts. Wood can be shaped with a jigsaw or circular saw. Accuracy here is crucial to maintain the integrity of the curve. Lay the materials along the marked curve, checking alignment frequently. Adjust as needed to ensure a seamless look. The final result should be a smooth, flowing line that enhances your garden’s design. Creating the perfect curved garden border involves both artistry and skill. Are you ready to transform your garden with elegant curves?Installation Process
Designing a curved garden border involves planning the shape and selecting materials. Outline the curve on the ground using a garden hose. Once satisfied with the design, install edging materials like bricks or stones to follow the curve.
Designing a curved garden border can transform your outdoor space, adding charm and character. The installation process is where your vision begins to take shape. It’s a hands-on endeavor that requires attention to detail and patience, but the results can be immensely rewarding. Let’s dive into the essential steps to ensure your garden border is both beautiful and long-lasting.Preparing The Ground
Start by marking the outline of your curved border with a garden hose or string. This allows you to visualize the curve and make adjustments before breaking ground. Once satisfied with the shape, remove any grass or weeds within the outline. Use a spade to dig a trench approximately 4 to 6 inches deep along the marked curve. This trench will hold your border materials in place. Ensure the trench is level. This is crucial for a neat and professional finish. Use a spirit level to check the evenness as you go.Laying The Border
Select materials that complement your garden style. Popular options include bricks, stones, or metal edging. Each material brings its own aesthetic and durability. Begin laying your chosen border material into the trench. Align each piece snugly against the next to maintain the curve and prevent gaps. Consider the height of your border. For a subtle look, keep it low; for a more defined edge, allow the materials to stand taller.Securing The Edging
Once your border is laid, it’s time to secure it. This step ensures that your border remains intact through seasons and weather conditions. For stone or brick borders, backfill the trench with soil or sand, packing it tightly around the base of the border materials. This stabilizes and supports the structure. If you’re using metal or plastic edging, stakes or pins can provide additional security. Place them at regular intervals along the border to hold it firmly in place. Take a step back and admire your work. Does the curve flow naturally? Make any final adjustments to achieve the desired look. Remember, the effort you invest in the installation process will pay off every time you admire your garden. Are you ready to take on this rewarding project?:max_bytes(150000):strip_icc()/spr-easyflex-no-dig-landscape-edging-kit-laura-hard-04-b601fc0708bc4522930427eca7d4168c.jpeg)
Credit: www.thespruce.com
Maintenance Tips
Designing a curved garden border adds elegance to your landscape. Use a garden hose to outline the curve. Dig along the hose for a clean border shape.
Designing a curved garden border is just the beginning. Ensuring its longevity requires regular care. Proper maintenance keeps your garden looking fresh and vibrant. Let’s explore some essential upkeep tasks.Regular Cleaning
Clean your garden border to prevent dirt buildup. Use a soft brush to gently remove debris. Rinse with water to keep the surface clean. This prevents stains and preserves the border’s appearance. Regular cleaning also deters pests and mold.Repairing Damages
Inspect the border for cracks or damage. Small issues can lead to bigger problems if ignored. Fill cracks with suitable sealants to prevent water damage. Replace broken sections to maintain the border’s shape. Regular repairs keep your garden looking neat and tidy.Design Inspirations
Creating a curved garden border adds elegance to any landscape. Choose flexible materials like plastic or metal edging for smooth curves. Plan the design by marking the desired shape with a garden hose or rope before installing the border.
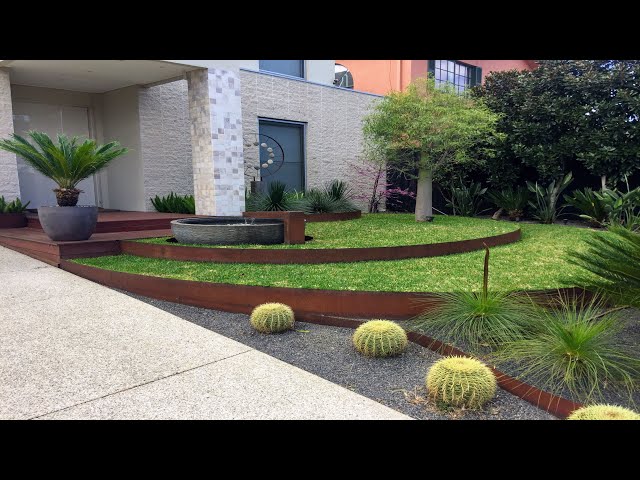
Designing a curved garden border can transform the aesthetic of your outdoor space, adding both beauty and functionality. The graceful lines of a curved border can soften the look of a garden, create visual interest, and guide the eye naturally through the landscape. Whether you prefer a classic or modern approach, there are plenty of design inspirations to consider.Classic Curved Borders
Classic designs often draw inspiration from traditional English gardens. Think of lush, flowing lines that mimic the natural curves of the landscape. A classic curved border might be lined with brick or stone, providing a timeless look that blends seamlessly into any garden setting. Consider incorporating perennials like lavender or hydrangeas for a splash of color. These plants not only add visual appeal but also attract pollinators, enhancing the ecosystem of your garden. You can also use small hedges to define the border, giving it a structured yet soft appearance. Imagine walking through your garden and feeling the nostalgia of a bygone era, where nature and design met in perfect harmony.Modern Design Ideas
If you lean towards contemporary aesthetics, modern curved borders offer a sleek and minimalist option. Opt for materials like metal edging or polished concrete for a clean and defined look. Incorporate ornamental grasses and architectural plants to create a striking contrast against the smooth lines of the border. This not only adds texture but also a dynamic element to the garden, drawing the eye with its boldness. For a modern twist, consider using lighting elements along the border. LED strip lights or solar-powered stakes can highlight the curves at night, creating a stunning visual display and extending the usability of your garden into the evening hours. When was the last time you redesigned a space in your home? Applying the same creativity to your garden might just bring unexpected joy and satisfaction. Take these inspirations and let your garden be a canvas for personal expression.
Credit: www.digsdigs.com
Frequently Asked Questions
How Do I Start Designing A Curved Garden Border?
Begin by sketching your desired border shape on paper. Use a garden hose to outline the curve in your garden. Ensure it complements existing landscape elements. Adjust the curve for accessibility and aesthetics. Finally, mark the outline with spray paint for accurate placement.
What Tools Are Needed For A Curved Garden Border?
You’ll need a garden hose, spray paint, spade, and edging material. A measuring tape and level are helpful for precision. For cutting materials, use a saw or garden shears. Ensure tools are in good condition for efficiency and safety during the project.
How Can I Ensure A Smooth Garden Curve?
Use a flexible garden hose to outline your curve. Adjust the hose until you achieve your desired smoothness. Mark the curve with spray paint. This method ensures a consistent and flowing design, enhancing the garden’s aesthetic appeal.
What Materials Are Best For Curved Garden Borders?
Choose materials like stone, brick, metal, or plastic edging. Consider your garden’s style and budget. Stone and brick offer durability and a natural look. Metal and plastic provide flexibility and affordability. Ensure materials can bend smoothly for a seamless curve.
Conclusion
Creating a curved garden border adds charm to any outdoor space. It enhances the landscape’s visual appeal and defines areas effectively. Start by outlining the shape you desire. Use garden hoses or ropes for guidance. Choose materials that complement your garden style.
Bricks, stones, or wood can work well. Ensure the border is stable and fits your garden layout. Keep maintenance in mind. Regular checks ensure lasting beauty. Enjoy your garden’s new look. Curved borders invite relaxation and creativity. Transform your garden into a personal oasis with this simple design.
Happy gardening!