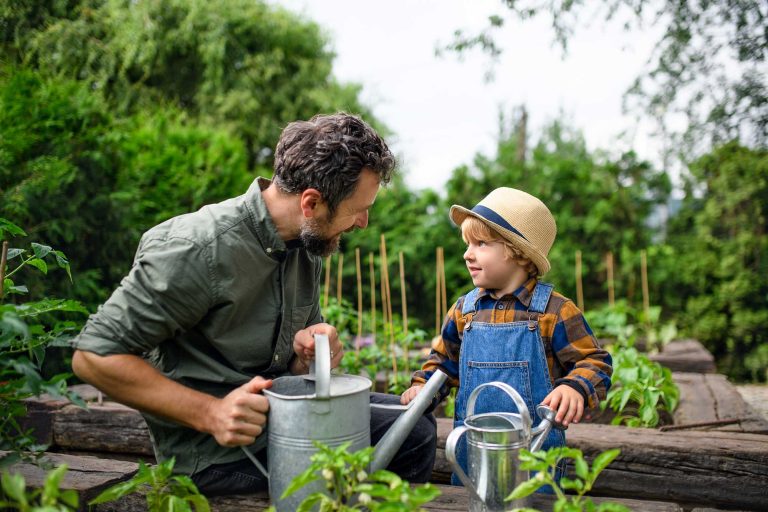
Imagine stepping outside to a garden filled with vibrant flowers and fresh vegetables. Picture the satisfaction of nurturing plants in a custom-made wooden garden planter that you built with your own hands.
You’re not just creating a planter; you’re crafting a piece of art that breathes life into your outdoor space. In this guide, you’ll discover the simple steps to make your own wooden garden planter. It’s easier than you think, and you don’t need fancy tools or an expert’s skill.
We’ll walk you through each step, offering tips and tricks to ensure your planter is both beautiful and functional. This isn’t just about following instructions—it’s about unleashing your creativity. As you read on, you’ll find the motivation to transform your garden into a personal oasis. You’ll gain confidence in your ability to create something meaningful with your own two hands. Let’s get started on this rewarding project that promises to bring beauty and tranquility to your garden. Your perfect planter awaits!
Materials Needed
Wooden planks, screws, and a drill form the basic kit for a garden planter. Add sandpaper to smooth edges and a measuring tape for precision. Finish it with wood stain for a polished look.
Building a wooden garden planter is a rewarding DIY project that brings a touch of nature to your backyard. Before you start, gathering the right materials is crucial for success. Having everything on hand saves time and makes the process more enjoyable. Let’s dive into the essential materials you’ll need to create a sturdy and beautiful garden planter.Wood
Choosing the right type of wood is important for durability. Cedar and redwood are excellent choices because they resist rot and insects. If you’re on a budget, pressure-treated lumber is a good alternative. Make sure the wood is untreated if you plan to grow edible plants.Screws And Nails
You’ll need screws and nails to hold your planter together. Galvanized or stainless steel screws are best for outdoor projects as they resist rust. Ensure you have a drill and hammer ready for quick assembly.Measuring Tape
Accurate measurements are the backbone of any successful DIY project. A measuring tape helps you cut wood to the correct size, ensuring your planter is symmetrical. Don’t underestimate the importance of precision in crafting a professional-looking planter.Wood Sealant Or Paint
Protecting your planter from the elements extends its lifespan. Use a wood sealant to shield it from moisture, or opt for exterior-grade paint for a pop of color. Remember, a well-sealed planter not only looks good but also lasts longer.Soil And Plants
Once your planter is built, you’ll need quality soil to fill it. Choose a soil mix suited to the plants you want to grow. Whether it’s herbs, flowers, or vegetables, your plants will thrive with the right nutrients.Optional: Liner
Consider adding a liner to your planter if you want extra protection for the wood. A liner keeps moisture away from the wood, further preventing rot. It’s a small addition that can make a big difference over time. Before you begin building, think about the space you have and what you want to grow. Are you ready to transform your outdoor space into a green oasis? Gathering these materials is your first step toward a flourishing garden.
Credit: diyhuntress.com
Choosing The Right Wood
Choosing the right wood for your wooden garden planter is crucial. The wood you choose affects the planter’s durability and look. Some woods last longer in outdoor conditions. Others might look beautiful but require more maintenance. Let’s explore the best options for your garden project.
Choosing Weather-resistant Wood
Weather-resistant wood is essential for garden planters. It stands up to rain, sun, and wind. Cedar and redwood are top choices. They naturally resist rot and insects. This means less maintenance and longer life for your planter. They also have a pleasant aroma.
Considering Treated Wood
Treated wood is another option. It undergoes a process to resist weather damage. This makes it a budget-friendly choice. Ensure the treatment is safe for plants. Some treatments contain chemicals harmful to plants. Look for eco-friendly treated wood.
Using Reclaimed Wood
Reclaimed wood is an eco-friendly choice. It repurposes old wood, reducing waste. It gives your garden a rustic charm. Check for nails or damage before using. Sand and treat it for best results. This wood tells a story and adds character.
Understanding Hardwoods Vs Softwoods
Hardwoods like oak are strong and durable. They resist wear better than softwoods. Softwoods like pine are easier to work with. They are lighter and more affordable. Consider your skill level and budget when choosing.
Evaluating Cost And Availability
Cost and availability are important factors. Exotic woods might look appealing but can be costly. Local wood is often cheaper and easier to find. Visit local suppliers to compare options. Choose wood that fits your budget and needs.
Tools Required
Building a wooden garden planter requires essential tools like a saw, drill, hammer, and measuring tape. Sandpaper smooths rough edges, ensuring a fine finish. Safety gear, including gloves and goggles, keeps you protected throughout the project.
Building a wooden garden planter is a rewarding DIY project that can add charm to any outdoor space. Before you get started, gathering the right tools is crucial. Having the proper tools not only makes the process smoother but also ensures your planter is sturdy and long-lasting.Measuring Tools
Accurate measurements are the foundation of any successful project. You will need a tape measure to ensure your wood pieces are cut precisely. A square is also handy for checking right angles, which is essential for creating a planter that sits perfectly flat on the ground. Remember, even a slight miscalculation can lead to a wobbly structure.Cutting Tools
Cutting the wood to the correct size is another critical step. A handsaw or circular saw will be your best friend here. If you have access to a miter saw, it can make cutting angles much easier and more precise. Using sharp blades is key to making clean cuts, reducing the chances of splinters or jagged edges.Drilling Tools
A drill is necessary for creating pilot holes and securing screws. Consider using a cordless drill for convenience and mobility, especially if your project site is far from a power outlet. Ensure you have the correct drill bit sizes to match your screws, preventing the wood from splitting.Fastening Tools
Screws and nails are the backbone of your planter’s stability. A screwdriver or hammer will be essential for this part of the task. Opt for galvanized screws or nails to prevent rust, especially since your planter will be exposed to the elements. Consistency in fastening will keep your planter sturdy and durable.Sanding Tools
After cutting and assembling your planter, sanding is a must to smooth rough edges and prevent splinters. Use sandpaper or a power sander for a polished finish. A finer grit will give your wood a smooth texture, making it safer to handle and more visually appealing.Safety Equipment
Safety should never be an afterthought. Equip yourself with safety goggles and gloves to protect against sawdust and sharp tools. Ear protection is also wise if you’re using loud power tools. Taking these precautions ensures you can focus on your project without unnecessary risks. Having the right tools can make the difference between a planter that lasts a season and one that stands for years. What tools do you rely on for your DIY projects? Your collection might just need a few additions to set you on the path to a beautiful, handmade garden feature.Design And Dimensions
Choose sturdy wood and decide on the planter size based on your garden space. Ensure the dimensions allow for adequate soil and root growth.
Designing your wooden garden planter is a delightful endeavor that combines creativity with practicality. Choosing the right design and dimensions is crucial, as it influences not only the aesthetics but also the functionality of your planter. A well-thought-out design will ensure your plants thrive while complementing the beauty of your garden space.Choosing The Right Dimensions
Start by considering the type of plants you want to grow. Different plants require different depths and widths. For instance, herbs and flowers might need shallower planters compared to vegetables. Measure the available space in your garden or patio. Be mindful of the planter’s height, as it should be easily accessible for watering and maintenance. Think about how much soil your plants will need. Larger dimensions mean more soil, which can support bigger plants or a variety of species.Designing For Aesthetics And Function
Opt for a design that complements your garden’s style. If your garden has a rustic look, consider using reclaimed wood for a charming touch. Include drainage holes in your design. This prevents waterlogging, which can harm plant roots. Think about adding wheels or handles for mobility. This allows you to move the planter around, catching the best sunlight or rearranging your garden layout.Creating A Versatile Layout
Consider modular designs. These allow you to rearrange planters as needed, offering flexibility in design and plant arrangement. Design your planter to accommodate accessories. Adding trellises for climbing plants or dividers for plant separation can be beneficial. Reflect on how your planter will change with seasons. Plan for expansions or modifications to adapt to varying plant needs throughout the year. By focusing on these elements, you can build a wooden garden planter that is not only functional but also a beautiful addition to your outdoor space. What unique design ideas do you have in mind for your planter?Cutting The Wood
Crafting wooden garden planters starts with cutting the wood to size. Measure carefully and use a sharp saw for clean edges. Accurate cuts ensure the planter’s sturdy structure.
Cutting the wood is a critical step in building a wooden garden planter. Precise cuts ensure the planter fits together neatly. Start with a clear plan. Measure twice, cut once. This ensures accuracy and minimizes waste. Gather all your tools before beginning. Safety goggles and gloves protect you during the cutting process.Gathering Your Tools
Before cutting, gather the essential tools. You’ll need a saw, measuring tape, and pencil. Choose a saw suitable for the wood type. Circular saws work well for straight cuts. If you prefer hand tools, a handsaw is fine. Ensure your measuring tape is accurate. A pencil helps mark measurements on the wood.Measuring The Wood
Accurate measurements are crucial. Measure each piece of wood twice to ensure precision. Mark the wood clearly with a pencil. Use a straight edge to guide your marks. This will help achieve clean, straight cuts. Double-check all measurements before cutting.Making The Cuts
With measurements marked, begin cutting the wood. Use a saw to follow the pencil lines. Keep your hand steady for a straight cut. If using a circular saw, guide it slowly along the line. For handsaws, use smooth, even strokes. Check each piece after cutting to ensure it meets the desired length.Sanding The Edges
After cutting, sand the edges of each wood piece. This removes splinters and smooths the surface. Use medium-grit sandpaper for the best results. Sand in the direction of the wood grain. This will give your planter a polished look.Assembly Process
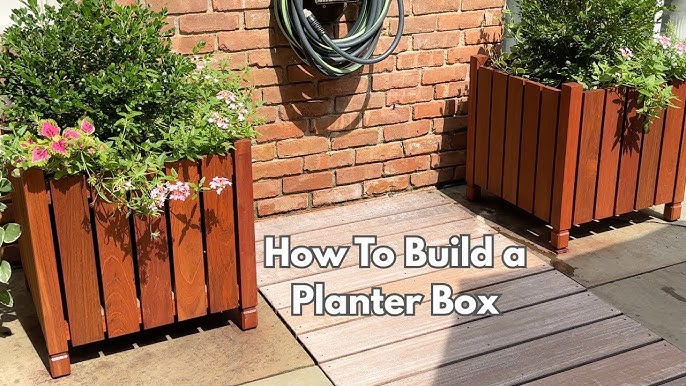
Begin by gathering all necessary materials like wood, nails, and a hammer. Cut the wood pieces to your desired size. Assemble the base and sides, ensuring each piece fits snugly together. Secure the joints with nails or screws for stability.
Finish with a coat of wood sealant for weather protection.
The assembly process is the heart of building a wooden garden planter. This stage ensures that all parts come together seamlessly. A well-assembled planter is sturdy and long-lasting. Follow the steps below for a successful assembly.Building The Frame
Start by gathering all frame pieces. Arrange them on a flat surface. Use screws to join the corners. Ensure each joint is tight. A square frame will provide stability. Double-check all angles. A level helps keep everything straight. Once satisfied, move to the next step.Attaching The Panels
Align the panels with the frame. Make sure they fit snugly. Secure them with screws or nails. Start from one side and work around. Each panel should meet the edge of the frame. Use a drill for faster results. Check for gaps as you go. Proper alignment prevents soil leakage.Securing The Base
Choose a durable material for the base. Wood, plywood, or slats work well. Attach the base inside the frame. Ensure it fits tightly against the walls. Use screws to secure it firmly. A strong base supports soil weight. Ensure good drainage by drilling holes. This prevents waterlogging and root rot.Finishing Touches
Completing your wooden garden planter involves adding the final touches. These details enhance both functionality and aesthetics. With careful attention, your planter will be durable and attractive.
Sanding The Edges
Smooth edges prevent splinters and make handling safer. Use fine-grit sandpaper to gently sand all edges. This step ensures a clean and polished look. Pay special attention to corners and surfaces where wood might be rough.
Applying Wood Treatment
Wood treatment protects against weather damage and pests. Choose a treatment suitable for outdoor use. Apply evenly using a brush or cloth. Let it dry completely before using the planter. This process prolongs the life of your planter.
Adding Decorative Elements
Decorative elements personalize your planter. Consider adding paint, stencils, or carvings. Use weather-resistant materials for lasting beauty. These touches express creativity and make your planter unique.

Credit: www.youtube.com
Placement And Usage
Place the wooden garden planter in a sunny spot for optimal plant growth. Ensure it’s accessible for watering and maintenance. Use quality soil and select appropriate plants for best results.
Building a wooden garden planter is both rewarding and practical. Once you’ve crafted your planter, it’s important to think about its placement and usage. A well-placed planter not only enhances your garden’s beauty but also ensures healthy plant growth. With the right location, soil preparation, and planting tips, your garden will thrive. Let’s explore these critical steps.Choosing The Location
Select a spot that receives adequate sunlight. Most plants need at least six hours of sunlight daily. Consider the planter’s accessibility. You should easily reach it for watering and maintenance. Ensure the area has good drainage to prevent waterlogging. Avoid placing the planter in areas prone to strong winds. This protects your plants from damage.Preparing The Soil
Start with quality soil for healthy plants. Mix garden soil with compost to enrich it. Ensure the soil is loose and well-draining. This helps roots grow and prevents water from pooling. Test the soil’s pH. Most plants prefer slightly acidic to neutral soil. Adjust the pH if necessary using lime or sulfur.Planting Tips
Choose plants suitable for your climate and season. Avoid overcrowding. Give each plant enough space to grow. Water the plants immediately after planting. This helps settle the soil around the roots. Mulch the topsoil to retain moisture and control weeds. Regularly check for pests and diseases. Address issues promptly to keep plants healthy.Maintenance Tips
Ensure your wooden garden planter lasts by sealing it with a waterproof finish. Regularly check for loose nails or screws. Keep the planter in a shaded area to prevent wood damage.
Maintaining your wooden garden planter ensures it thrives through the seasons. Proper care extends its lifespan and keeps your plants healthy. Regular attention to detail prevents minor issues from becoming major problems.Seasonal Care
Seasonal changes impact your planter’s condition. During winter, protect it from harsh weather. Store it inside or cover it with a waterproof sheet. In summer, check for signs of drying. Apply a coat of sealant to retain moisture. Spring and fall require cleaning. Remove debris and inspect for any wear. Regularly checking and adjusting care based on season helps maintain its quality.Repairing Damages
Occasional damage is common. Address it promptly to prevent further deterioration. For minor scratches, sand the area gently. Apply wood polish to restore its appearance. Cracks need filling. Use wood filler and let it dry completely. Repaint or reseal for added protection. Loose parts require tightening. Check screws and nails, and replace if necessary. Regular repairs keep your planter sturdy and functional.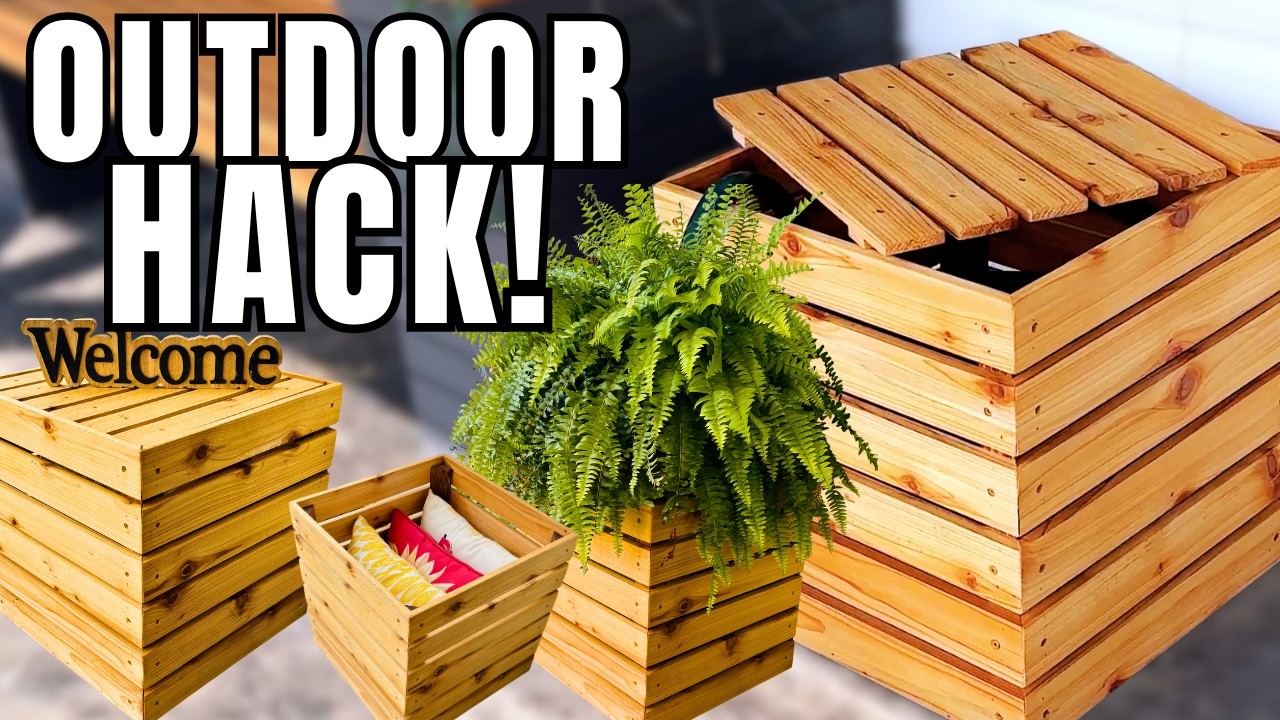
Credit: www.youtube.com
Frequently Asked Questions
What Tools Are Needed To Build A Wooden Planter?
To build a wooden planter, you’ll need a saw, drill, measuring tape, and screws. Sandpaper helps smooth edges, while a wood sealant preserves the planter. These tools ensure precision and durability. Always wear safety gear when using power tools.
How Do I Choose The Right Wood For Planters?
Choose rot-resistant woods like cedar or redwood for durability. These woods withstand moisture and insects. Ensure the wood is untreated and safe for plants. Proper wood selection enhances the planter’s longevity and appearance.
How To Ensure Proper Drainage In Wooden Planters?
Drill holes at the bottom of your planter for drainage. Line the base with gravel or pebbles. This prevents waterlogging and root rot, ensuring healthy plant growth. Proper drainage is crucial for plant health and longevity.
Can I Paint Or Stain My Wooden Planter?
Yes, painting or staining enhances aesthetics and protects the wood. Choose outdoor-grade products for durability. Ensure the paint or stain is safe for plants. This adds color and prolongs the planter’s lifespan, making it a beautiful garden addition.
Conclusion
Crafting a wooden garden planter is rewarding. Simple materials. Basic tools. You gain a personal touch to your garden. Plus, it enhances your outdoor space beautifully. Building it yourself saves money, too. Feel proud of your handmade project. Invite nature closer to your home.
Enjoy the process, even if it’s your first time. Remember, practice makes perfect. Soon, you’ll grow herbs, flowers, or veggies with ease. Creating something with your hands feels amazing. Your garden will thank you. So, gather your supplies and start today.
Happy gardening!