Imagine stepping into your backyard and being greeted by a lush garden filled with vibrant flowers and fresh vegetables. Sounds dreamy, right?
You can make this vision a reality by building a large garden planter box. Not only does it bring beauty and life to your outdoor space, but it’s also a practical way to grow your own produce. If you’ve ever felt overwhelmed by the thought of garden projects, you’re not alone.
This article will guide you through the process step-by-step, breaking it down into simple, manageable tasks. You’ll discover tips and tricks that make the construction easy and enjoyable, even if you’re not a DIY expert. Picture yourself feeling the satisfaction of completing your own planter box, knowing you’ve made something beautiful with your own hands. By the end of this article, you’ll be equipped with everything you need to create a stunning garden feature that will be the envy of all your neighbors. So, let’s dive in and get started!

Credit: www.youtube.com
Materials Needed
Building a large garden planter box requires wood planks, screws, a drill, and a saw. Consider waterproof sealant and a measuring tape for precision and durability.
Building a large garden planter box is an exciting project that can transform your outdoor space into a vibrant oasis. Understanding the materials needed is crucial to ensure your planter is both durable and visually appealing. By gathering the right materials, you can create a planter box that will stand the test of time, weather, and the weight of your plants.Wood
Choosing the right type of wood is essential. Cedar and redwood are excellent choices due to their natural resistance to rot and insects. If you’re on a budget, treated pine can also work well. Make sure to select wood that is weather-resistant to prolong the lifespan of your planter box.Screws And Nails
You will need galvanized or stainless steel screws and nails to assemble your planter box. These materials prevent rust, which can weaken the structure over time. It’s a small detail, but it makes a big difference in durability.Drill
A reliable drill is necessary for creating pilot holes and driving screws. This tool will be your best friend throughout the construction process. Consider using a cordless drill for ease of movement around your workspace.Measuring Tape
Precision is key in building a sturdy planter box. A measuring tape ensures all pieces are cut to the correct size. Taking accurate measurements helps avoid waste and ensures a snug fit.Wood Saw
A wood saw is essential for cutting your wood to the desired lengths. A circular saw or handsaw can be used depending on your comfort level and the complexity of your design. Safety should be your priority, so always use protective gear.Landscape Fabric
Landscape fabric lines the inside of your planter to allow proper drainage while preventing soil erosion. It’s a simple addition that greatly enhances the functionality of your garden box.Sandpaper
Smooth out rough edges with sandpaper to prevent splinters and create a polished look. This step might seem minor, but it adds a professional touch to your finished product.Wood Sealer
Applying a wood sealer protects your planter from moisture and UV rays. This step ensures your planter box looks great and lasts for years. Choose a sealer that is environmentally friendly to keep your garden safe.Corner Braces (optional)
For added stability, you might consider using corner braces. They provide extra support and can help maintain the shape of your planter. If you plan on moving your planter frequently, these braces can be a game-changer.Paint Or Stain (optional)
Personalize your planter box by adding a splash of color or a natural stain. This not only enhances the appearance but also adds an additional layer of protection against the elements. Choose a finish that complements your garden’s aesthetic. Have you thought about the impact of choosing sustainable materials for your planter box? By selecting eco-friendly options, you contribute to a healthier environment while creating a beautiful garden space. Now that you have a clear idea of the materials needed, you’re ready to start building your very own large garden planter box.
Credit: www.oliveandjunehome.com
Choosing The Right Location
Choosing the right location for your large garden planter box is crucial to ensure your plants thrive. The perfect spot can make all the difference between a flourishing garden and one that struggles to grow. Here, we’ll explore key considerations to help you select the ideal location for your planter box.
Assess Sunlight Exposure
Begin by evaluating how much sunlight the area receives. Most vegetables and flowers need at least 6-8 hours of direct sunlight daily. Observe your garden at different times to determine the sunniest spots. If you’re planning to grow shade-loving plants, opt for a location with dappled sunlight or partial shade.
Consider Accessibility
Ensure your planter box is easily accessible for daily care and maintenance. You want to be able to water, prune, and harvest without any hassle. Think about how often you’ll need to access your plants and choose a location that allows you to do so comfortably.
Check Soil Drainage
Good drainage is essential for healthy plant growth. Avoid areas where water pools after rain. If drainage is a concern, consider elevating your planter box or adding drainage holes to prevent waterlogging.
Evaluate Wind Protection
Strong winds can damage plants, especially young seedlings. Look for a spot that offers natural windbreaks, such as hedges or fences. If your garden is prone to high winds, consider installing a wind barrier to shield your plants.
Think About Aesthetics
While functionality is key, aesthetics matter too. Choose a location that enhances the beauty of your garden. Picture how the planter box will fit into the overall landscape. A well-placed planter box can become a stunning focal point.
By carefully considering these factors, you can create an environment where your plants will thrive, turning your garden into a lush and rewarding space. Where will you place your planter box to ensure maximum growth and beauty?
Design And Dimensions
Building a large garden planter box involves choosing sturdy materials and a size that fits your space. Consider depth and width to ensure ample room for plant roots to grow.
Designing a large garden planter box involves more than just functionality; it’s about creating something that enhances your outdoor space. The design and dimensions you choose will influence not only the aesthetic appeal but also the types of plants you can grow. Let’s dive into what you need to consider to get this right.Size Considerations
Determining the right size for your planter box is crucial. Think about the space where you plan to place it. Will it be on a patio, balcony, or directly in your garden? Measure this area to ensure your planter fits comfortably without overcrowding. Consider the types of plants you’ll grow. Some plants require more room for their roots to expand. If you’re planning to grow vegetables like tomatoes or peppers, a deeper box will be necessary. Don’t forget to account for the growth of plants over time; they’ll need room to flourish.Shape Options
The shape of your planter box can dramatically impact the overall look of your garden. Rectangular boxes are versatile and can fit snugly against walls or fences, making them great for maximizing space. They are ideal for linear arrangements, like a row of herbs or flowers. Square boxes offer a balanced look and work well for creating focal points in your garden. You can group multiple square planters for a geometric design. If you want something more unique, consider circular or oval designs. These shapes can add a softer, more organic feel to your space. When choosing the shape, think about how it will complement the existing elements in your garden. Does it harmonize with your outdoor furniture or other decor? Picking the right shape can tie your garden together, creating a cohesive and inviting environment.Tools Required
Building a large garden planter box requires several essential tools. Gather a saw, drill, measuring tape, and screws to ensure precise assembly. Sandpaper smooths edges, while a level helps maintain balance.
Building a large garden planter box is a rewarding project, but it requires the right tools to ensure success. Knowing what tools you’ll need can save you time and frustration, making the process smoother and more enjoyable. Imagine the satisfaction of crafting a sturdy and beautiful planter that will house your favorite blooms or veggies. Let’s dive into the essential tools that will help bring your garden dreams to life.Hammer And Nails
A trusty hammer and a selection of nails are indispensable. They will help you secure the wooden panels of your planter box. Choose nails that are long enough to provide a strong hold, but not too long that they protrude from the other side. If you’re unsure about the nail size, consult with someone at your local hardware store.Drill And Screws
A drill is crucial for creating pilot holes that prevent the wood from splitting. Screws, unlike nails, offer better grip and are more reliable for holding the planter box together. Opt for weather-resistant screws to ensure longevity, especially if your planter will be exposed to the elements.Saw
Whether you opt for a hand saw or a power saw, this tool is essential for cutting wood to the desired dimensions. Measure twice and cut once to avoid mistakes. If you’re new to sawing, practice on scrap pieces first to gain confidence.Measuring Tape
Accuracy is vital in any building project. A measuring tape will help you measure lengths precisely, ensuring your planter box fits the space and plants you have in mind. Double-check measurements to prevent any miscalculations that could throw off the entire project.Level
A level ensures that your planter box is even on all sides. This tool is key for a professional-looking finish and prevents water from pooling unevenly. Place the level on various surfaces of the planter during assembly to maintain symmetry.Square
A carpenter’s square helps you create perfect corners and lines, which are crucial for structural integrity. It’s particularly useful for checking right angles as you assemble the box. A square can be your best friend when aiming for a neat and orderly appearance.Sandpaper
Sandpaper smooths out rough edges and surfaces, making the planter box safe to handle. Choose a grit suitable for your wood type. A smoother finish not only looks better but also prevents splinters when you’re tending to your plants.Protective Gear
Safety first! Equip yourself with gloves, goggles, and a dust mask. These items protect you from wood dust, splinters, and any accidental mishaps. Working safely ensures you can enjoy your gardening hobby without injury. Are you ready to gather these tools and embark on your planter box project? Consider how each tool contributes to the overall build and envision the sturdy, elegant box you’ll soon have in your garden.Step-by-step Construction
Gather all necessary materials and tools. Begin by cutting wood panels to desired size. Assemble the panels securely using screws. Ensure stability by reinforcing corners. Add a bottom with drainage holes. Finally, fill with soil, and your garden planter box is ready for planting.
Building a large garden planter box can transform your outdoor space into a lush, vibrant haven. This hands-on project is not only rewarding but also offers endless possibilities for personalizing your garden. Whether you’re a seasoned gardener or a DIY novice, following a structured approach can make the process enjoyable and efficient. Let’s dive into the step-by-step construction of your very own garden planter box.Preparing The Wood
Start by selecting the right type of wood. Cedar and redwood are excellent choices due to their natural resistance to decay. Measure and cut the wood pieces accurately. Precision here ensures everything fits snugly later. Sand down any rough edges to prevent splinters.Assembling The Frame
Lay out the cut pieces on a flat surface. Begin by attaching the shorter pieces to the longer ones to form a rectangle. Use galvanized screws to secure the joints. This ensures durability even in harsh weather conditions.Installing The Base
Flip the frame upside down. Attach the base panels inside the frame, ensuring they fit snugly against the edges. Drill drainage holes into the base. This prevents water from pooling and keeps your plants healthy.Adding The Sides
Stand the frame upright and attach the side panels. Ensure each piece aligns perfectly with the base and corners. Secure the sides with screws at regular intervals. This adds strength and stability to the structure.Securing The Structure
Double-check all screws and joints to make sure they are tight. Reinforce any loose areas with additional screws if necessary. Consider applying a wood sealant for added protection. This extends the lifespan of your planter box and enhances its appearance. By taking the time to carefully construct your garden planter box, you create a foundation for a thriving garden. Imagine the satisfaction of nurturing your plants in a space you built with your own hands. What will you grow in your new planter box?
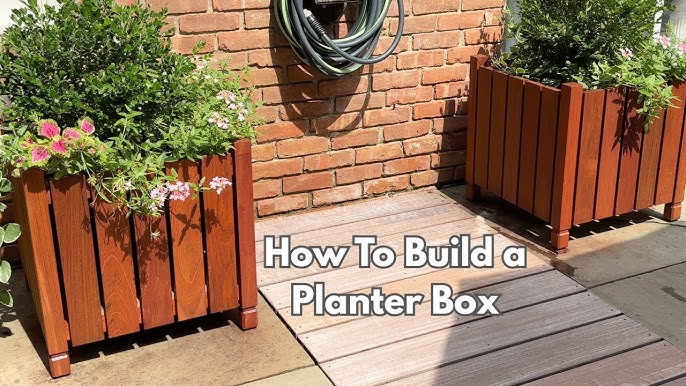
Credit: crystelmontenegrohome.com
Waterproofing And Drainage
Proper waterproofing and drainage ensure your large garden planter box lasts longer. Use quality materials to prevent water damage. This keeps plants healthy and roots dry.
Waterproofing and drainage are crucial for building a large garden planter box that can withstand the elements and ensure healthy plant growth. Without proper waterproofing, your planter box may suffer from rot and decay, reducing its lifespan. Effective drainage is equally important, as it prevents waterlogging, allowing your plants to thrive.Applying Sealant
Start by selecting a high-quality waterproof sealant to protect your planter box from moisture. This will create a barrier, preventing water from seeping into the wood and causing damage. Apply the sealant evenly on all surfaces of the planter box, paying extra attention to the joints and edges where water is most likely to penetrate. Allow the sealant to dry completely, following the manufacturer’s instructions. It’s often a good idea to apply a second coat for added protection. Remember, a well-sealed planter box not only lasts longer but also provides a healthier environment for your plants.Installing Drainage Holes
Proper drainage is essential to prevent water from accumulating at the bottom of your planter box. Use a drill to create several evenly spaced drainage holes, ensuring water can escape easily. Consider using a drill bit that matches the size of your drainage holes for precision. If you’re worried about soil escaping through the holes, place a layer of landscape fabric or small stones at the bottom of the planter box. These small measures can make a big difference in maintaining the health of your plants. Have you ever noticed how much happier your plants look when they’re not sitting in soggy soil? By addressing waterproofing and drainage, you’re setting up your garden planter box for success.Finishing Touches
Add the final touches by sanding rough edges and applying weather-resistant sealant. Choose appropriate plants to enhance your planter box. Arrange them for optimal growth and aesthetic appeal.
After assembling your large garden planter box, the finishing touches are what will make it truly stand out. This is where your planter box transforms from a simple structure into a beautiful addition to your garden space. These final steps will not only enhance its appearance but also ensure its longevity.Sanding And Smoothing
Before you move on to painting or staining, it’s crucial to sand your planter box thoroughly. This step eliminates any rough edges and splinters, making it safer to handle. Use a medium-grit sandpaper to smooth the surface, then switch to a fine-grit paper for a polished finish. Imagine running your hand along the wood and feeling nothing but a sleek, smooth surface. That’s the goal here. Plus, sanding helps prepare the wood to absorb paint or stain more evenly.Painting Or Staining
Once your planter is smooth, decide whether you want to paint or stain it. Each option offers its own benefits. Paint allows you to match your planter to your garden’s color scheme or your home’s exterior. Choose a weather-resistant paint to protect the wood from the elements. Staining, on the other hand, enhances the natural beauty of the wood. It penetrates deeply, offering better protection against moisture. Opt for a stain that complements the natural hues of your garden. To engage your creative side, think about using a combination of both paint and stain. Perhaps a stained body with painted accents? This can add a unique touch to your garden. Remember, these finishing touches are more than just cosmetic. They extend the life of your planter box, ensuring it remains a cherished part of your garden for years. What’s your preferred finishing touch for a garden project?Planting And Maintenance Tips
Construct a large garden planter box with sturdy wood for long-lasting durability. Ensure proper drainage by drilling holes at the bottom. Fill with quality soil and position in a sunny spot for optimal plant growth.
Planting and maintaining a large garden planter box requires some thoughtful steps. With the right care, your plants will thrive and bring beauty to your space. Start by preparing the soil, choose suitable plants, and keep up with regular care. This guide will help you with each stage.Soil Preparation
Good soil is the foundation of a healthy garden. Start by using a mix of topsoil, compost, and peat moss. This blend offers nutrients and ensures proper drainage. Check for any rocks or debris in the soil. Remove them to allow roots to grow freely. Water the soil before planting to keep it moist and welcoming for your plants.Choosing Plants
Select plants that suit your climate and sunlight conditions. Consider the size and growth rate of each plant. This helps in avoiding overcrowding. Opt for a mix of perennials and annuals for year-round color. Edibles like herbs and vegetables are also great choices. They add beauty and utility to your planter box.Regular Care
Water your plants regularly, ensuring the soil stays moist but not soggy. Check for pests and remove them promptly to protect your plants. Add mulch to retain moisture and reduce weeds. Fertilize every few weeks to keep the soil rich. Prune dead leaves and stems to promote healthy growth. Regular care keeps your garden thriving and vibrant.Frequently Asked Questions
What Materials Do I Need For A Garden Planter Box?
To build a large garden planter box, you’ll need wood planks, nails or screws, a drill, a saw, and wood sealer. Choose rot-resistant wood like cedar. A weed barrier fabric is also recommended. These materials ensure durability and protect plants.
How Do I Ensure Proper Drainage?
Drill holes at the bottom of the planter box to ensure proper drainage. Line the bottom with gravel or small stones. This prevents waterlogging and root rot. Good drainage is crucial for healthy plant growth.
How Deep Should A Planter Box Be?
A planter box should be at least 12 inches deep. This depth allows for root growth and proper plant development. Deeper boxes are ideal for larger plants. Adjust the depth based on the types of plants you intend to grow.
Can I Use Treated Wood For Planter Boxes?
Using treated wood is not recommended for planter boxes. Chemicals in treated wood can leach into the soil and harm plants. Opt for natural, untreated wood like cedar. It’s safer and more environmentally friendly.
Conclusion
Building a large garden planter box can be rewarding. You create space for flowers or vegetables. Follow steps carefully for a sturdy box. Choose materials that last in weather. Measure twice, cut once for best fit. Secure corners with strong screws.
Add quality soil for healthy plants. Water regularly for growth. Enjoy watching your garden thrive! Share your experience with friends. Encourage others to try making their own. Gardening brings joy and beauty to any space. Remember, patience and care lead to success.
Your garden awaits your touch!