Imagine stepping into your backyard and being greeted by a vibrant, flourishing garden. A garden planter can transform any space into a little slice of paradise.
You don’t need to be a master gardener or a DIY expert to create one. It’s easier than you think, and with a few simple steps, you can build a garden planter that suits your style and needs. Why should you stick around?
Because we’re about to unlock the secrets of crafting your very own garden planter. By reading on, you’ll discover how this project can bring you joy, satisfaction, and even a touch of serenity. You deserve a space where you can unwind, and a garden planter can be the perfect addition to make that happen. So, let’s dive into how you can turn your outdoor area into a personal oasis.
Materials Needed
Gather wood planks, nails, and a hammer for the structure. Include a saw for cutting the wood. Consider soil, plants, and a liner to complete your garden planter.
Building a garden planter is a rewarding DIY project. Before diving into the assembly, gather essential materials. This ensures a smooth and successful construction process. Having the right materials at hand saves time and effort. Below is a list of materials needed to create a sturdy and beautiful garden planter.Wood Or Timber
Select durable wood like cedar or redwood. These resist rot and decay. Ensure the wood is untreated to avoid chemicals leaching into the soil.Screws And Nails
Use galvanized screws and nails. They prevent rust and enhance planter longevity. Choose the correct size for secure assembly.Drill And Drill Bits
A power drill speeds up the building process. Have drill bits that match the size of the screws for efficient drilling.Measuring Tape
Accuracy is key in building. A measuring tape ensures precise cuts and fits. Double-check measurements before cutting.Hand Saw Or Circular Saw
A saw is essential for cutting wood pieces. A hand saw is suitable for small projects. Use a circular saw for larger, quicker cuts.Sandpaper
Smooth rough edges with sandpaper. This prevents splinters and gives a polished finish. Select medium-grit sandpaper for best results.Wood Sealer Or Stain
Protect the wood with a sealer or stain. This adds a layer of protection against the elements. It also enhances the planter’s appearance.Landscape Fabric
Line the planter with landscape fabric. It prevents soil erosion and aids drainage. Ensure it covers the bottom and sides. These materials are vital for a successful garden planter project. Proper preparation leads to a sturdy and appealing result.
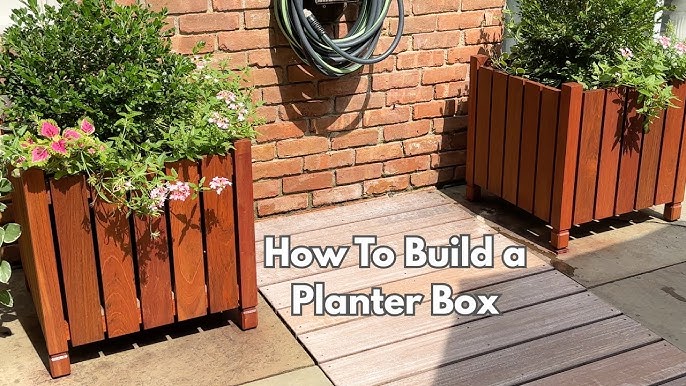
Credit: www.youtube.com
Choosing The Right Location
Selecting an ideal spot for your garden planter is crucial. Ensure it receives ample sunlight and is near a water source. Consider the planter’s accessibility for maintenance and harvesting.
Choosing the right location for your garden planter is crucial. A suitable spot ensures healthy plant growth and enhances your garden’s beauty. Consider sunlight, accessibility, and soil quality when deciding. These factors play a significant role in your planter’s success.Assess Sunlight Exposure
Plants need sunlight to thrive. Check how much sun your chosen spot gets daily. Different plants have different sunlight needs. Some require full sun, while others prefer shade. Observe the area at different times to ensure it’s right for your plants.Ensure Easy Access
Choose a location that’s easy to reach. This makes planting, watering, and harvesting simpler. Avoid placing planters in hard-to-reach spots. Consider paths and walkways for convenient access.Check Soil Quality
Soil quality impacts plant health. Test the soil in your chosen spot. Ensure it’s fertile and well-draining. Good soil supports strong root systems and healthy growth. If the soil isn’t ideal, consider adding compost or soil amendments.Consider Water Source
Plants need regular watering. Choose a spot near a water source. This simplifies irrigation and maintenance. Ensure hoses or watering cans can reach the planter easily.Avoid High Traffic Areas
High traffic areas can lead to damage. Avoid placing planters in spots where people frequently walk. Protect your plants from accidental tripping or trampling.Account For Seasonal Changes
Weather changes can impact plant growth. Consider seasonal shifts in your area. Ensure your location is suitable year-round. Plan for protection against harsh weather conditions.Designing The Planter
Crafting a garden planter involves selecting the right materials and tools. Measure and cut wood pieces to size. Assemble them securely to create a sturdy base. Add soil and plants for a vibrant touch to your garden.
Designing a garden planter is an exciting project. It allows creativity and personal expression. With a few thoughtful choices, you can create a planter that complements your space and style. Here are some key aspects to consider:Size And Shape Considerations
Select a size that fits your available space. Small spaces suit compact planters, while larger areas can accommodate bigger ones. Consider the types of plants you wish to grow. Some plants need more room for roots. Others thrive in smaller containers. Shape is also crucial. Rectangular planters fit against walls or fences. Circular ones create focal points in open spaces. Think about accessibility for watering and maintenance. A planter too tall or wide can be hard to manage.Choosing The Right Style
The style of your planter should match your garden’s theme. Modern spaces look great with sleek, minimalist designs. Rustic gardens benefit from wooden or vintage styles. Consider the materials. Wood offers warmth and blends with natural settings. Metal adds an industrial touch. Plastic is lightweight and versatile. Each material has its own charm and maintenance needs. Choose colors that harmonize with your outdoor decor. Neutral tones provide a classic look. Bright colors add a playful touch.
Credit: www.lifespacegardens.com
Gathering Tools
Gather essential tools like a hammer, saw, and drill to construct a garden planter. Measure wood pieces accurately for a perfect fit. Assemble using nails or screws, ensuring stability and durability.
Gathering the right tools is a crucial step in building a garden planter. The proper tools not only make the project easier but also ensure that your planter is sturdy and durable. Imagine trying to hammer a nail with a wrench. It’s possible, but not efficient. Having the right tool for the job saves time and frustration. So, let’s dive into the essential tools you’ll need to bring your garden planter to life.Choosing The Right Saw
When selecting a saw, consider the material you’ll be working with. A hand saw is sufficient for small, simple projects, but an electric saw can make quick work of larger pieces. If you’re cutting through thick wood, a power saw is your best bet. Always prioritize safety and read the manual if you’re not familiar with the tool.Essential Measuring Tools
Accuracy is key in any building project. A reliable tape measure is your best friend. Pair it with a carpenter’s square to ensure your cuts are straight and angles are precise. Remember, measure twice, cut once. This old adage will save you time and materials.Gathering Fastening Tools
Fastening tools are crucial for assembling your planter. A hammer is a basic necessity, but a power drill can speed up the process. Screws provide a stronger hold than nails, especially for outdoor planters. Make sure you have the right drill bits and screwdriver heads for your screws.Safety Equipment
Safety should never be an afterthought. Protect your eyes with safety goggles. Gloves will shield your hands from splinters and blisters. Consider ear protection if you’re using loud power tools. Your safety is worth more than any garden planter.Organizing Your Workspace
A clutter-free workspace enhances focus and efficiency. Lay out your tools in an organized manner. This saves you from unnecessary searching and keeps your project moving smoothly. A well-organized workspace is a sign of a thoughtful gardener. Building a garden planter is not just about having the right tools, but also knowing how to use them. Are there any tools you find essential that didn’t make this list? Share your thoughts and experiences. Your insights might help someone else create their perfect garden planter.Cutting The Wood
Cutting the wood is essential in building a garden planter. Measure and mark the planks accurately. Use a saw to ensure smooth edges for perfect assembly.
Cutting the wood is a crucial step in building a garden planter. It sets the foundation for the entire project. With precise cuts, your planter will not only look great but also stand the test of time.Measuring The Pieces
Before you pick up a saw, grab your measuring tape. Accurate measurements are key to ensuring each piece fits perfectly. Measure twice to avoid mistakes; it’s easier than cutting again. Write down your measurements for each side, bottom, and support pieces. This checklist helps you stay organized. Visualize how these pieces fit together to confirm your measurements.Cutting Techniques
Select the right saw for your task. A hand saw works well for smaller pieces, while a circular saw is ideal for larger cuts. Ensure your saw blade is sharp to make clean cuts. Consider using a miter box for angled cuts. It helps in achieving precise angles, which can add a professional touch to your planter. Clamp your wood firmly to prevent any movement during cutting, ensuring safety and accuracy. Remember the first time you successfully cut a piece of wood? It felt empowering, right? Relive that moment by creating something that lasts. How will you ensure your cuts are both clean and safe?
Credit: www.gardenary.com
Assembling The Frame
Begin by arranging the planks to form the planter’s rectangular shape. Secure corners with screws for stability. Ensure the frame is level before proceeding to the next steps.
Assembling the frame of your garden planter is an exciting step where your project starts to take shape. It’s where the individual pieces come together to form a sturdy structure that will hold your plants. As you dive into this process, remember that precision and patience are key.Joining The Base
Start by laying out the pieces that will form the base of your planter. Ensure they fit snugly together to create a strong foundation. Use wood screws to secure the joints, checking that each corner is at a perfect right angle. Consider using a carpenter’s square to double-check your angles. This tool can be invaluable in maintaining the integrity of your frame. Remember, a solid base is crucial for the overall stability of your planter.Securing The Sides
Once your base is complete, it’s time to attach the sides. Align each side panel with the edges of the base, ensuring they are flush. Use clamps to hold the panels in place as you drill pilot holes for your screws. Think about the height of your planter and what you plan to grow. Taller sides can accommodate deeper root systems. Secure each side with screws, making sure they’re evenly spaced for a clean finish. As you work, ask yourself: Are the panels level? A level frame ensures proper drainage and even plant growth. Don’t hesitate to adjust as needed for the best results.Finishing Touches
Add decorative trims or paint for a personal touch. Secure joints firmly for stability and longevity. Ensure drainage holes are properly placed for healthy plants.
Creating a garden planter is a rewarding project. The final steps can make it shine. Finishing touches enhance both appearance and longevity. These steps add beauty and protect your work.Sanding The Edges
Sanding smooths rough edges. It prevents splinters and adds a polished look. Use fine-grit sandpaper for best results. Sand along the grain of the wood. This technique avoids scratches. Check all corners and edges. Ensure they’re smooth to touch. Sanding also helps finish adhere better.Applying A Finish
A finish protects your planter from elements. Choose between paint, stain, or sealant. Paint adds color and style. Stain enhances natural wood grain. Sealant provides a clear protective layer. Apply the finish evenly. Use a brush or a spray for application. Allow it to dry completely. Consider applying multiple coats. This ensures maximum protection.Preparing The Planter For Use
Select a sturdy location with good drainage for your planter. Fill with quality soil, ensuring it’s loose and nutrient-rich. Add suitable plants, spacing them for growth and airflow.
Preparing the planter for use is a crucial step in ensuring your garden thrives. It’s easy to assume that throwing some soil into a container and planting seeds is enough, but a little preparation can go a long way in creating a healthy environment for your plants. Let’s dive into the essential steps that will help your plants flourish, starting with adding a liner and drilling drainage holes.Adding A Liner
Adding a liner to your planter is like giving your plants a cozy, protective blanket. It helps retain moisture while preventing soil from washing away. You can use materials like plastic sheeting or landscaping fabric, which are both affordable and effective. Cut the liner to fit snugly inside the planter, ensuring it covers the entire interior. This simple addition can significantly extend the life of your planter by protecting it from water damage. Have you ever wondered why some planters last longer than others? Often, it’s the liner that makes the difference. It acts as a barrier, keeping moisture where it’s needed while also protecting the planter’s surface.Drilling Drainage Holes
Drainage holes are vital for preventing water from pooling at the bottom of your planter, which can lead to root rot. Without them, even the most beautifully crafted planters can become a plant’s worst nightmare. Before you grab your drill, determine the appropriate number of holes based on the size of your planter. A small planter might only need one or two holes, while larger ones will require more. Drill the holes evenly spaced across the bottom, ensuring they are large enough to allow excess water to escape but not so large that soil falls through. A well-drilled planter is like a well-ventilated room for your plants, offering just the right balance of air and water flow. As you prepare your planter, ask yourself: Are you setting your plants up for success? Taking the time to add a liner and drill drainage holes ensures that your garden is not only beautiful but also sustainable.Filling The Planter
Filling the Planter Choose a nutrient-rich soil mix to support plant growth. Layer gravel at the bottom for drainage. Fill the planter with soil, leaving room for planting.
Filling your garden planter is a crucial step in ensuring that your plants thrive. It’s not just about tossing in some soil and hoping for the best. The way you fill your planter can impact plant health, growth rate, and even your gardening satisfaction. Are you ready to create the perfect environment for your plants?Choosing The Right Soil
Selecting the right soil is like choosing the foundation for a house. The quality of soil you use can make or break your planter’s success. Opt for a mix that retains moisture but drains well. Consider using potting soil for container gardens, as it’s designed to provide nutrients while preventing waterlogging. Have you ever noticed that some plants flourish while others struggle? The secret often lies in the soil. Experiment with different types to see what works best for your specific plants.Layering For Optimal Drainage
Layering in your planter is akin to building a sandwich—each layer has a purpose. Start with a thin layer of gravel or small stones at the bottom to enhance drainage. This prevents water from pooling and drowning your plant roots. Next, add a layer of coarse sand or perlite to further aid drainage. This ensures your soil doesn’t become compacted and suffocating for roots. Finally, top it off with your chosen soil mix. Think of this as the icing on the cake, providing nutrients and a cozy home for your plants. Have you ever thought about how these layers mimic natural soil profiles? Each serves a distinct role in maintaining plant health. Would you consider adjusting these layers to suit different plant needs?Planting Tips
Building a garden planter is a rewarding project. It brings both beauty and fresh produce to your space. Planting tips can make a big difference in your planter’s success. Understanding how to choose and arrange plants is essential. Let’s explore some key strategies for achieving a thriving garden planter.
Selecting Plants
Choose plants that suit your climate and sunlight conditions. Consider the size of your planter. Small spaces need smaller plants. Look for plants with similar water and light needs. This makes caring for them easier. Herbs like basil or parsley are great for beginners. Flowers like marigolds add color and repel pests.
Arranging For Aesthetics
Arrange plants by height for a pleasing look. Taller plants should be at the back or center. Place shorter plants around them for balance. Use colors and textures to create interest. Mix different leaf shapes and sizes. A well-arranged planter looks full and vibrant. Keep space between plants for growth. Overcrowding can hinder plant health.
Frequently Asked Questions
What Materials Are Needed For A Garden Planter?
To build a garden planter, you’ll need wood, screws, a saw, drill, and measuring tape. Choose wood that’s weather-resistant, like cedar or redwood. Don’t forget a liner to protect the wood and a suitable soil mix for your plants. Preparing these materials ensures a sturdy and durable planter.
How Do I Choose The Right Wood?
Select wood like cedar or redwood for garden planters. These types are naturally resistant to decay and insects. Avoid treated wood as it may leach harmful chemicals into the soil. Choosing the right wood ensures your planter’s longevity and safety for plants.
Can I Build A Planter Without Tools?
Building a planter without tools is challenging but possible using pre-cut wood kits. These kits are designed for easy assembly by snapping or slotting pieces together. While less customizable, they offer a quick and convenient solution for beginners or those without tools.
What Size Should My Planter Be?
The planter size depends on the plants you wish to grow. Small herbs need less space, while vegetables require deeper containers. Ensure enough room for root growth and proper drainage. A well-sized planter provides a healthy environment for your plants to thrive.
Conclusion
Building a garden planter is simple and rewarding. Gather your tools and materials. Follow the steps carefully. Measure and cut accurately. Secure the pieces well. Use quality soil for healthy plants. Add your favorite flowers or herbs. Water them regularly and watch them grow.
Enjoy your beautiful garden space. Perfect for patios or balconies. Get creative with design and colors. Share your planter creation with family and friends. Gardening is a relaxing hobby. It brings joy and beauty to your home. Happy planting!