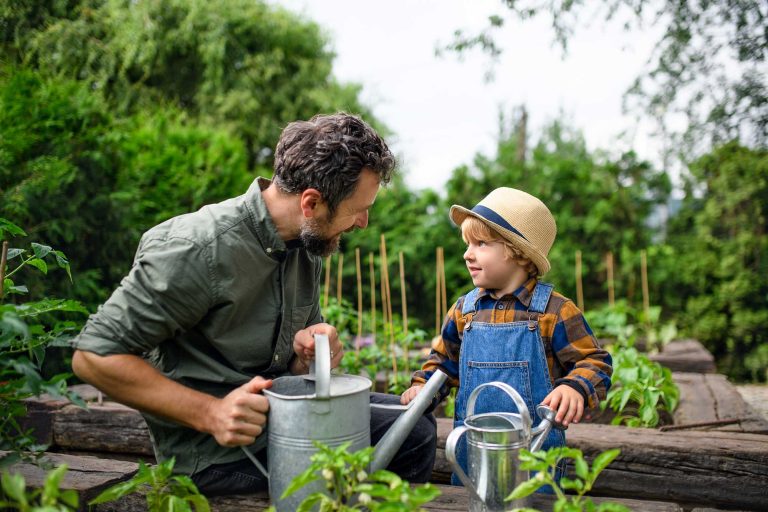
Imagine having fresh basil, mint, and thyme at your fingertips, ready to elevate your home-cooked meals. Creating an indoor herb garden from a pallet is not only a fun project but also a step towards a healthier lifestyle.
You don’t need a green thumb or a big space to start; just a few simple materials and a bit of creativity. This guide will show you how to transform a simple pallet into a thriving herb garden, bringing the vibrancy of nature right into your home.
You’ll learn the secrets to growing herbs indoors, ensuring you have a fresh supply year-round. Get ready to discover how easy and rewarding it is to cultivate your own herb garden, and soon, you’ll wonder how you ever cooked without it.
Choosing The Right Pallet
Creating an indoor herb garden from a pallet is not just a sustainable choice, but also a stylish way to bring nature into your home. However, the success of your herb garden hinges on selecting the right pallet. A pallet forms the backbone of your garden, so it’s crucial to choose wisely. Your choice can impact the garden’s longevity, safety, and aesthetic appeal.
Inspecting For Safety
Safety should be your top priority when choosing a pallet. Not all pallets are created equal; some might be treated with harmful chemicals. Look for pallets stamped with “HT,” indicating they were heat-treated rather than chemically treated. Avoid pallets marked “MB” as they contain methyl bromide, a toxic pesticide.
Additionally, check for any visible damage or signs of wear. A sturdy pallet ensures your herb garden remains intact and minimizes the risk of collapse. If you notice loose nails or splintered wood, it’s best to choose another option.
Selecting The Size
The size of your pallet will define how many herbs you can accommodate. Consider the space available in your home. A smaller pallet might be perfect for a kitchen counter, while a larger one could fit nicely in a sunlit corner.
Think about the variety of herbs you want to grow. Do you fancy a diverse selection, or would you prefer focusing on a few favorites? A larger pallet offers more flexibility, but remember that a compact setup can be just as rewarding.
Ultimately, the size you choose should align with your gardening ambitions and the space you have available. Which herbs will you grow first?
Preparing The Pallet
Preparing the Pallet Select a sturdy pallet without cracks. Sand it to remove splinters and smooth the surface. Ensure the wood is clean and dry before use.
Preparing the pallet for your indoor herb garden is a crucial step that can make or break your project. A well-prepared pallet ensures not only the longevity of your garden but also the safety and aesthetic of your indoor space. Let’s dive into the essential steps to get your pallet ready for its new life as a thriving herb garden.Cleaning The Wood
Start by giving your pallet a thorough cleaning. Pallets can be home to dirt, grime, and even harmful chemicals, especially if they’ve been used for shipping. Use a stiff brush and soapy water to scrub all surfaces of the pallet. Rinse well with clean water and let it dry completely in a well-ventilated area. This step is not just about cleanliness; it’s about preparing a healthy foundation for your herbs.Sanding Rough Edges
Once your pallet is clean and dry, it’s time to sand down any rough edges. This is important not just for the look of your garden, but also for your safety. No one wants to deal with splinters while tending to their herbs. Use medium-grit sandpaper to smooth out the surface, focusing on corners and edges. If you have a power sander, it can speed up the process. After sanding, wipe down the pallet with a damp cloth to remove any dust particles. Imagine the satisfaction of running your hand over the smooth wood, knowing it’s ready to support your garden. Doesn’t it feel like a small victory toward creating something beautiful and functional?Designing The Layout
Arrange the pallet vertically against a wall for an efficient herb garden layout. Secure small pots to the slats, ensuring each plant gets ample sunlight. Use chalkboard paint on the pallet for easy labeling and aesthetic appeal.
Designing the layout of your indoor herb garden is a crucial step that can make or break its functionality and aesthetic appeal. The right layout can maximize space, ensure each plant receives adequate light, and enhance the visual charm of your home. Whether you choose a vertical or horizontal setup, thoughtful planning can turn a simple pallet into a thriving green oasis.Vertical Vs Horizontal Setup
Choosing between a vertical and horizontal setup depends largely on your space and style preferences. A vertical garden is perfect for tight spaces, allowing you to utilize walls and create an eye-catching green display. It’s a fantastic way to keep your herbs within reach, especially in smaller kitchens. On the other hand, a horizontal setup may suit those with more floor space, offering an easy-to-access, sprawling herb garden. This layout can mimic a traditional garden bed and is great for anyone who enjoys a more hands-on gardening experience. Think about the light sources in your home. Which direction gets the most sunlight? That might guide your choice.Mapping Plant Placement
Mapping out where each plant will go is like solving a fun puzzle. Start by considering the light and water needs of your herbs. Basil, for instance, loves the sun, while mint can thrive in slightly shadier spots. Group plants with similar needs together to make caring for them simpler. You might want to place taller plants at the back or top of your setup to avoid shading smaller ones. Or perhaps you prefer to arrange them by usage, placing your most frequently used herbs like parsley and thyme within easy reach. Do you have a favorite herb? Give it a prime spot to shine. Don’t forget to label your plants. It’s easy to confuse seedlings, and labels can add a charming touch to your garden. What creative labeling ideas can you come up with?Credit: katebeavis.com
Selecting Herbs
Choosing the right herbs is key to a successful indoor garden. Select herbs that thrive indoors like basil, mint, and parsley. Ensure you have adequate sunlight and proper drainage for healthy growth.
Selecting the right herbs is crucial for your indoor herb garden. You want herbs that thrive indoors and complement each other. Consider your cooking needs and available space. This will help you choose the best varieties for your pallet garden.Easy-to-grow Varieties
Start with herbs that are easy to grow indoors. Basil, mint, and parsley are great choices. They adapt well to indoor conditions and require minimal care. Basil loves sunlight, so place it near a window. Mint prefers moist soil and indirect light. Parsley grows well with moderate light and regular watering. These herbs are perfect for beginners.Pairing Complementary Plants
Pair herbs that have similar growing needs. Basil and oregano both thrive with plenty of sunlight. Thyme and rosemary prefer drier soil and full sun. Grouping them ensures they flourish together. Avoid mixing herbs with different water and light requirements. This will prevent one from overshadowing the other.Building Plant Holders
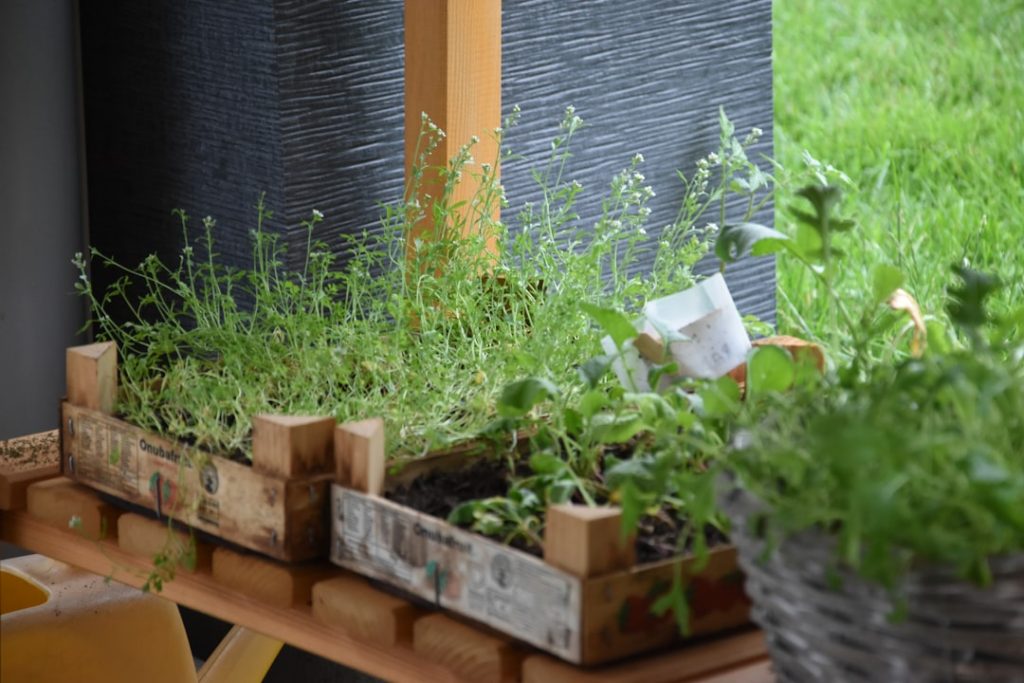
Transform a wooden pallet into a charming indoor herb garden. Secure pots and soil to the pallet, ensuring stability. Arrange herbs like basil and mint for easy access and fresh flavors.
Creating an indoor herb garden from a pallet can transform your living space into a green oasis. The key to making this work lies in the plant holders. These are the unsung heroes that keep your herbs thriving. Building them might seem daunting, but it’s simpler than you think. You’ll need some basic tools and a bit of creativity. Let’s break down the process and see how you can bring your herb garden to life.Creating Planter Boxes
Start by gathering wooden planks or repurposing old wood. The size of your planter boxes depends on the pallet’s width. Cut your wood to fit snugly into the sections of the pallet. Materials you need: – Wooden planks – Nails or screws – Hammer or drill – Measuring tape Steps to follow: 1. Measure the inside width of each pallet section. 2. Cut the wood to create rectangular or square boxes. 3. Assemble the pieces using nails or screws to form a sturdy box. Think about the depth of your boxes. Herbs like basil and mint need more soil space than smaller herbs like thyme. This attention to detail ensures your plants have room to grow.Attaching To Pallet
Once your boxes are ready, it’s time to attach them to the pallet. This might sound tricky, but it’s a straightforward process. Steps to attach: – Position the planter boxes in the sections of the pallet. – Use strong screws to secure each box to the pallet frame. – Ensure each box is level to prevent water from pooling in one area. Consider the weight of your filled boxes. Will your wall support it? If not, leaning the pallet against a wall or securing it with brackets could be a safer option. Do you have any personal tips to add? Share them in the comments and let’s grow together.Soil And Planting
Transform a simple pallet into a thriving indoor herb garden. Use quality soil and small pots for each herb. Place the pallet in a sunny spot to nurture growth.
Creating an indoor herb garden from a pallet brings fresh flavors to your kitchen. Soil and planting are vital for a thriving herb garden. Let’s explore how to choose the right soil and proper planting techniques.Choosing The Right Soil
The soil is the foundation for healthy herbs. Use a well-draining potting mix. Avoid garden soil; it can be too dense. A light mix allows roots to breathe. Look for soil with added organic matter. It retains moisture without waterlogging. Consider adding perlite for improved drainage. This prevents root rot and promotes growth.Proper Planting Techniques
Planting herbs correctly ensures robust growth. Space them according to their size. Crowded plants compete for nutrients. Dig holes slightly larger than root balls. Place the herb gently into the hole. Fill with soil, pressing lightly around the base. Water immediately after planting. This helps settle the soil around roots. Ensure each plant receives adequate sunlight. Most herbs need at least six hours of light daily. Rotate plants if necessary to maximize exposure.Watering And Maintenance
Ensure herbs receive sufficient sunlight and water for growth. Regularly check soil moisture and avoid overwatering. Trim herbs to promote healthy development and prevent overcrowding in your indoor pallet garden.
Watering and maintaining your indoor herb garden is crucial. It ensures healthy and thriving plants. Proper care extends the life of your herbs and enhances their flavors. Regular attention will keep them lush and vibrant.Setting A Watering Schedule
Establishing a consistent watering routine is key. Herbs in pallets need regular moisture. Check the soil with your finger. If it’s dry, it’s time to water. Overwatering can cause root rot. Ensure excess water can drain away. Use a tray to catch water if needed. This keeps your space clean and tidy.Preventing Pests
Pests can be a nuisance. Inspect your herbs regularly. Look for signs of bugs or damage. Use natural remedies to deter pests. A mix of water and mild soap can help. Spray it on leaves gently. Ensure good air circulation around your plants. This reduces the risk of pest infestation. Keep your herbs healthy and strong. Healthy plants are less attractive to pests.
Credit: www.redhousegarden.com
Lighting Requirements
Ensure your indoor herb garden receives ample light. Place it near a sunny window or use grow lights to mimic sunlight. Proper lighting helps herbs thrive and grow healthy.
Proper lighting is crucial for growing a healthy indoor herb garden from a pallet. Light is the primary source of energy for your herbs, and without it, they can’t perform photosynthesis effectively. Whether you rely on natural light or choose artificial lighting, understanding your options can make all the difference.Natural Vs Artificial Light
Natural light is the most cost-effective option for your indoor herb garden. If you have a sunny windowsill that receives plenty of sunlight, you’re in luck. However, not everyone has access to abundant natural light, especially during winter months or in apartments with limited window space. Artificial light can be a great alternative, providing a consistent light source all year round. LED grow lights are energy-efficient and come in various spectrums tailored for plant growth. Consider investing in a timer to ensure your herbs receive the right amount of light each day without you having to remember to turn the lights on and off.Positioning For Optimal Growth
Where you position your pallet garden can significantly impact the growth of your herbs. Aim to place it where the herbs can receive at least 6-8 hours of light daily. South-facing windows are typically ideal for maximum sunlight exposure. If using artificial lights, position the lights about 6-12 inches above the herbs. Adjust the height as your plants grow to avoid burning them while ensuring they get enough light. Have you noticed your herbs leaning towards the light? It might be a sign that they need more light exposure, or perhaps a little rotation to balance their growth. By understanding and adjusting the lighting requirements, you can create a thriving indoor herb garden that not only beautifies your home but also provides fresh herbs for your culinary adventures.Decorative Touches
Transform a wooden pallet into a charming indoor herb garden. Hang it on a wall or stand it upright. Fill with pots of basil, mint, or rosemary to add greenery and fresh flavors to your home.
Decorative touches can transform your indoor herb garden into a charming display. A pallet provides a rustic base, but adding unique elements brings personality. Your garden can reflect your style while serving its purpose.Adding Personal Style
Embrace creativity with colorful pots or containers. Paint them in vibrant shades to match your room’s theme. Use different shapes and sizes for added visual interest. Hang small decorations or trinkets on the pallet. They can be seasonal or match your favorite colors. Plants themselves add beauty. Choose herbs with varying leaf colors and textures. Basil, mint, and rosemary offer striking contrasts. Arrange them thoughtfully for an appealing look. Incorporate small fairy lights around your pallet. They add a soft glow in the evening.Incorporating Labels
Labels are practical and decorative. Use chalkboard paint on small wooden signs. Write herb names in elegant script with chalk. Update them easily if you change plants. Alternatively, use metal or ceramic tags. They add a sophisticated touch. Consider making labels with recycled materials. Old spoons or forks can be engraved or painted. Attach them to the pallet for a vintage charm. Labels help identify herbs, especially for guests. They also make maintenance easier for you.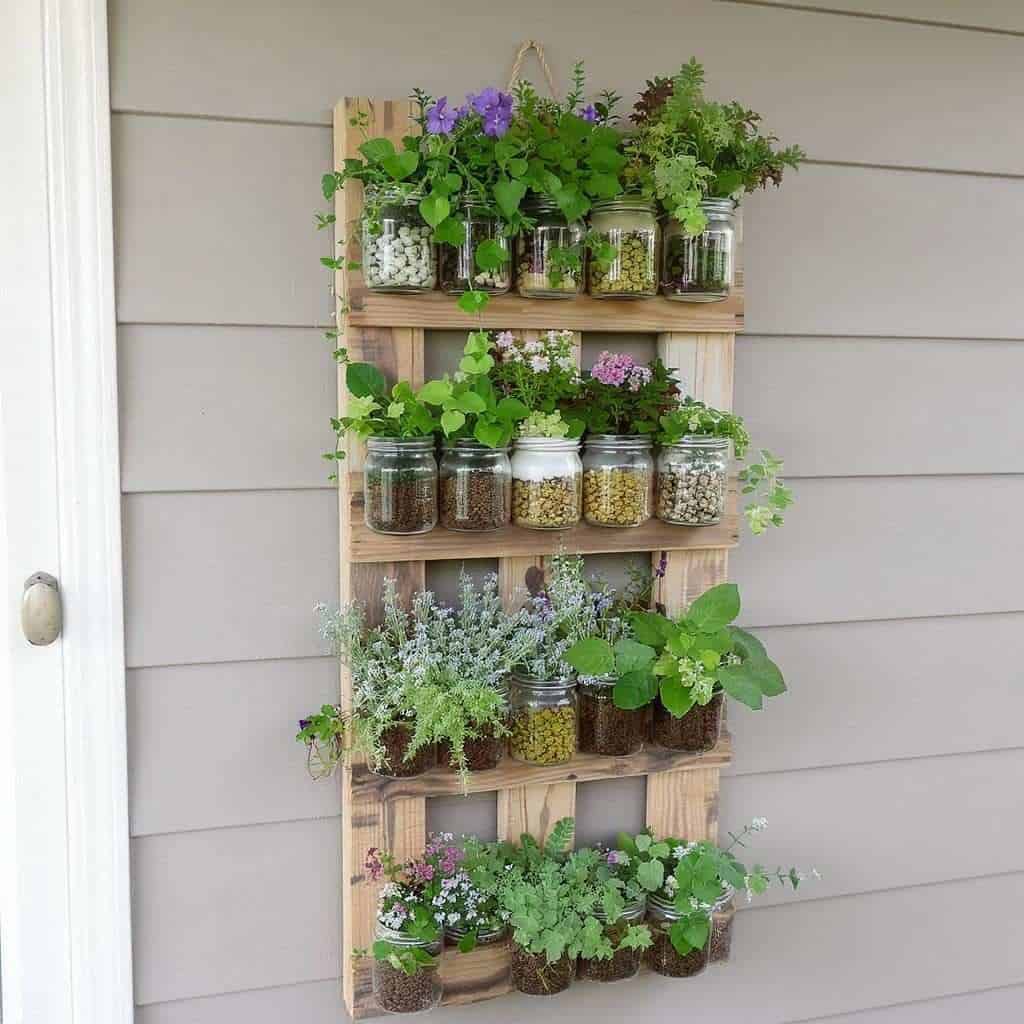
Credit: diycozyliving.com
Troubleshooting Common Issues
Creating an indoor herb garden from a pallet can face issues like poor drainage and inadequate sunlight. Ensure proper drainage by drilling holes, and position the pallet near a window for ample sunlight. Regularly check moisture levels and rotate plants for even light exposure.
Creating an indoor herb garden from a pallet is a rewarding project, bringing fresh flavors to your kitchen and a touch of green to your home. However, like any gardening endeavor, it can come with its own set of challenges. Let’s tackle some common issues you might face and how to solve them effectively.Dealing With Mold
Mold can be a pesky problem in indoor herb gardens, especially in humid conditions. To combat mold, ensure your herbs have proper airflow. You might consider placing a small fan nearby to circulate the air. Avoid overwatering your herbs. Use your finger to check the soil moisture and water only when it feels dry to the touch. If you spot mold on the soil surface, remove the affected area and sprinkle cinnamon, a natural antifungal, to help prevent further growth.Reviving Wilting Plants
Wilting plants can be a sign of either overwatering or underwatering. Check the soil moisture to determine the cause. If the soil is soggy, let it dry out before the next watering. Ensure your herbs are receiving enough light. Move them closer to a window or supplement with a grow light if necessary. Consider repotting if the roots seem cramped, as this can also lead to wilting. Remember, every plant has its own needs. Paying attention to your herbs’ specific requirements can make all the difference. Have you faced any other challenges with your indoor garden? Share your experiences and tips in the comments!Frequently Asked Questions
What Materials Are Needed For A Pallet Herb Garden?
To create a pallet herb garden, you’ll need a wooden pallet, potting soil, landscape fabric, and herb seeds or seedlings. Ensure the pallet is clean and untreated to avoid chemical exposure. Landscape fabric will help retain soil and moisture, while potting soil provides essential nutrients for your herbs.
How Do You Prepare A Pallet For Planting?
Start by cleaning the pallet thoroughly to remove dirt and debris. Sand any rough edges to prevent splinters. Cover the back and sides with landscape fabric, securing it with staples. This prevents soil from spilling out. Finally, lay the pallet flat and fill with potting soil.
Which Herbs Grow Best Indoors On A Pallet?
Herbs like basil, mint, parsley, thyme, and cilantro thrive indoors on a pallet. These herbs require minimal sunlight and adapt well to indoor environments. Additionally, their compact size makes them ideal for pallet gardening. Ensure they receive adequate water and occasional sunlight for optimal growth.
How Much Sunlight Do Indoor Herbs Need?
Most indoor herbs require about 4 to 6 hours of sunlight daily. Place your pallet near a sunny window or use grow lights if natural light is limited. Regular rotation of the pallet ensures even exposure, promoting healthy growth and preventing herbs from leaning towards the light source.
Conclusion
Creating an indoor herb garden from a pallet is simple. Just follow the steps, and soon you’ll have fresh herbs at home. Enjoy the benefits of cooking with homegrown ingredients. Herbs add flavor and aroma to dishes. Plus, they are healthy and nutritious.
Your garden will also beautify your space. It’s a fun project for all ages. Share your herb garden ideas with friends. They might want to try it too. Start today and see your herbs grow. It’s rewarding and satisfying. Happy gardening!